How to Create a Classical Music Hip Hop Beat

Contents
How to Create a Classical Music Hip Hop Beat – If you are a fan of classical music and hip hop, you may be wondering how to create a classical music hip hop beat.
Introduction
Few musical styles have had as much of an impact on popular culture as hip hop. This genre has been responsible for some of the biggest hits of the past few decades, and its influence can be heard in everything from pop to rock to country. And while hip hop is usually associated with modern music, it actually has its roots in a much older style: classical music.
In this guide, we’ll show you how to create a classical music hip hop beat. We’ll start by going over some basics about both genres, and then we’ll give you a step-by-step guide to creating your own beat. By the end, you’ll have a solid foundation on which you can build your own classical hip hop masterpieces!
What You Will Need
In order to create a classical music hip hop beat, you will need the following:
-A computer with a DAW (digital audio workstation) installed, such as Logic Pro, Cubase, Pro Tools, FL Studio, Ableton Live, GarageBand, or Audacity.
-A MIDI keyboard (optional but recommended).
-Some classical music samples. You can find these online or purchase a commercially available sample pack.
-Basic knowledge of your DAW and how to create and arrange beats.
Step One: Choose Your Instruments
The first step to make a classical music hip hop beat is to choose the instruments you will use. For this type of beat, you will need a piano or keyboard, a string instrument, and a percussion instrument. You may also want to add in a second keyboard or synth for added texture.
Step Two: Program the Beat
The next step is to program the beat. You can do this in a number of ways, but it is easiest to use a software program such as Reason, Logic, or Pro Tools. If you do not have access to one of these programs, you can also use a simple drum machine.
Step Three: Add the Melody
Now it is time to add the melody. This should be done on the piano or keyboard. If you are using a synth, you can also create the melody on that instrument. Once you have the melody, you can add in some chords to support it.
Step Four: Add the Bass Line
The bass line is one of the most important parts of any hip hop beat. It should be added next. Again, this can be done on either the piano or keyboard. Once you have the bass line in place, you can fill in any other parts that are needed such as drums and percussion.
If you want to get creative, you can also add in other elements such as samples or scratch tracks. This will give your beat more depth and dimension.
Step Two: Set the Tempo
Now that you have your drums recorded, it’s time to set the tempo. Start by opening your DAW and creating a new project. Then, use a metronome or drum machine to set the tempo for your song. Most hip hop beats are between 60 and 90 BPM. Once you have the tempo set, you can start adding in your other instruments.
Step Three: Layer the Drums
Now that you have your basic percussion loop, it’s time to add some drums. Start by finding a drum loop that you like and drag it into your project. If you can’t find a loop that you like, you can always create your own by recording yourself or using a drum machine.
Once you have your drum loop, it’s time to start layering. To do this, you’ll want to add a kick drum on the first and third beats of each measure and a snare drum on the second and fourth beats. You can create these drums yourself or use samples from another song.
If you want to add more flavor to your beat, you can also add hi-hats, cymbals, and other percussion instruments. Just be sure not to overdo it! Too many instruments will make your beat sound cluttered and messy.
Step Four: Add the Bass
Use the lower notes on your keyboard to create a catchy bass melody. Play around with the rhythm and don’t be afraid to experiment. You can always delete what you don’t like later. Once you have a good bassline, try recording it so you can play it back and add other instruments over top.
Step Five: Add the Pads
In this final step, we add pads to really give our track some depth and atmosphere. Pads are typically played on a keyboard, and come in all sorts of different shapes and sizes. For our purposes, we’ll be using a simple square wave pad.
First, load up your favorite soft synth. I’m using NI Massive in this example. Once you have your synth open, create a new patch and turn on the sustain pedal. This will ensure that our notes sustain indefinitely.
Next, choose a sound that you like. I’m partial to dark, atmospheric pads, so I’ve chosen a patch that has a bit of reverb on it.
Now, play some notes in the key of your beat. I like to experiment with different note placements here, so don’t be afraid to try something different. Once you have a few notes that you like, tweak the decay knob until you find a sound that you’re happy with.
Finally, add some effects to your pads. Reverb is always a good choice, but feel free to experiment with other effects as well. Delay can work well on pads, as can chorus or flanger.
Step Six: Add the Leads
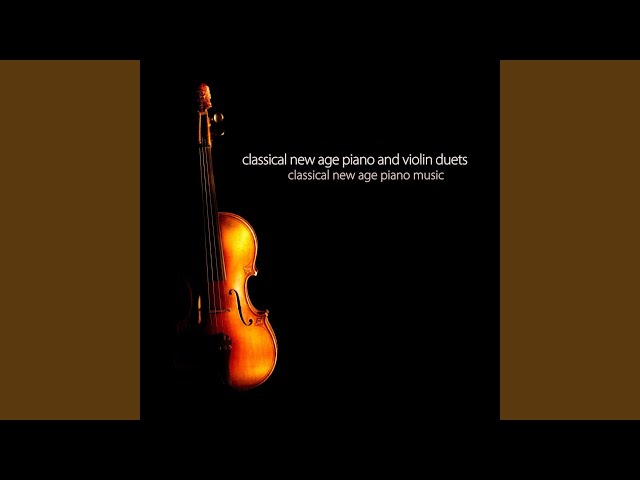
Now that the basic beat is complete with drums, piano, and bass, it is time to add some lead instruments. In a classical music style hip hop beat, this is typically going to be a violin or cello. Choose a simple melody that fits with the chord progression of the piano part. If you need help, there are many websites that offer free sheet music for popular songs. Once you have your melody, record it into your Digital Audio Workstation. If you do not have a real instrument to record, you can use a keyboard or even find royalty free loops online to use in your beat.
Step Seven: Add the Percussion
Now that you have your three main tracks, it’s time to add some percussion. You can use any kind of drums that you want for this part, but it’s important to make sure that they complement the other instruments in the beat. For example, if you’re using a piano as your main melody, you might want to use a drum machine that has a lot of high-pitched sounds.
Step Eight: Arrange Your Track
Eight might be considered an unlucky number in some cultures, but for producers, it’s the magic number. That’s because eight bars is the perfect amount of time to introduce a beat, melody, or both before introducing a change.
In this final step, you’ll arrangement your track using the principles of good songwriting. You’ll introduce your main idea, then develop it over the course of eight bars before introducing a new idea. This could be a new melody, harmony, or both. Once you have your track arranged, you can start thinking about how to mix and master it to get the sound you want.
Step Nine: Export Your Track
Now that you have a completed track, it’s time to export it so you can share it with the world! In your DAW, look for an “Export” or “Render” option in the File menu. This will allow you to create a new audio file from your track that can be imported into other applications or played on any media player.
Be sure to choose a high-quality export format, such as WAV or AIFF, to ensure that your track sounds its best when played back. If you plan on sharing your track online, you may also want to create a lower-quality MP3 version for easy streaming and downloading.
Once you’ve exported your track, it’s time to share it with the world! Upload it to your favorite music-sharing site, post it on social media, or simply send it to your friends and family. With a little hard work and practice, you’ll be creating hip hop beats that are sure to get everyone moving.