How to Shoot Hip Hop Music Videos with Professional Camera Techniques

Contents
If you want to make your hip hop music videos look professional, you’ll need to use some quality camera techniques. This blog post will teach you how to shoot hip hop music videos like a pro!
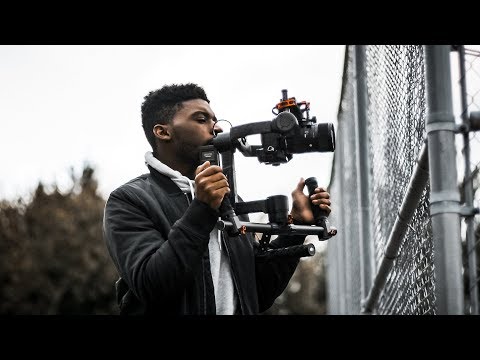
Camera Movement
Panning
One of the most basic, and therefore most versatile, camera movements is panning. To pan, simply position your camera on a tripod so it’s facing your subject, then rotate the camera along its horizontal or vertical axis. When done correctly, panning creates the illusion of motion while your subject remains in focus.
If you want to pan along the horizontal axis (also known as “tracking”), place your camera on a tripod and lock down the tripod head. Then, when you’re ready to start filming, rotate the tripod head from left to right or right to left. As you do this, keep your eye on the viewfinder or LCD screen and try to keep your subject in the center of the frame.
If you want to pan along the vertical axis, simply position your camera on a tripod so it’s pointing straight up or straight down, then tilt the tripod head up or down. Again, as you do this, keep your eye on the viewfinder or LCD screen and try to keep your subject in the center of the frame.
Panning can be used for a variety of purposes, such as following a moving subject or giving viewers a sense of place by showing them what’s around a static object. In general, though, it’s best to use panning sparingly — too much movement can be disorienting for viewers and make it difficult for them to follow what’s happening on screen.
Tilting
Tilting is a camera movement where the camera tilts up or down on its vertical axis. You can use tilting to change the plane of your shot, which can be useful for following vertical action, or to convey a sense of unease or foreboding. You can achieve a similar effect by tilting your camera when shooting handheld, but it takes a lot more practice to keep your shot steady.
If you’re shooting on a tripod, you can tilting by loosening the head and moving it up or down. If you’re handheld, you’ll need to twist your body and raise or lower the camera. Remember to keep your elbows close to your body and tuck in your chin to avoid shake.
Tilting is often combined with panning (see below) to keep the subject in frame as they move around.
Zooming
Zooming is one of the most essential and commonly used camera movements in music video production. There are two types of zooms – optical and digital. Optical zooms use the camera’s lens to zoom in and out, while digital zooms use a process called “interpolation” to create the illusion of zooming.
While interpolation can provide good results, it can also lead to a loss of image quality, so it’s generally best to avoid digital zooms if possible. Instead, focus on using optical zooms to get the desired effect.
There are two basic ways to execute a zoom shot: by hand or with a tripod. Handheld zooms are more challenging to execute smoothly, but they can add a sense of energy and dynamism to your shots. If you opt for a handheld zoom, be sure to keep your hands steady and your movements slow and controlled.
Tripod-mounted zooms will yield the smoothest results, but they can be somewhat cumbersome to set up and require more time to execute. If you’re shooting with a DSLR or mirrorless camera, you may also want to invest in a motorized zoom control, which will allow you to operate the zoom remotely and achieve even smoother results.
Framing
Any video has three key components: audio, video, and story. Of these, video is arguably the most important. After all, a video with great audio and a terrible video will be hard to watch, but a video with great video and a terrible audio might still be watchable. The same can be said for a video with a great story but terrible video and audio.
Rule of Thirds
One of the most important aspects of shooting a music video is the framing. This is what will give your video that professional look. The rule of thirds is a great place to start when framing your shots.
The rule of thirds is a guideline that states that you should place your subject off to the side, rather than in the middle of the frame. This gives the shot more depth and makes it more interesting to look at.
To use the rule of thirds, imagine your frame divided into nine equal sections. Place your subject at one of the intersections, rather than in the middle of the frame. You can also use this technique when composing your shots. For example, if you’re shooting a close-up of a person’s face, place their eyes at one of the intersections.
Keep in mind that the rule of thirds is just a guideline. There are no hard and fast rules in music video making! Play around with different compositions and see what looks best to you.
Headroom
Headroom is the amount of space between the top of your subject’s head and the frame. In general, you want to leave a little bit of headroom — about two fists — so that your subject has some “breathing room.” If you have too much headroom, it can make your subject look small or disconnected from the frame; if you have too little headroom, your subject may feel cramped or uncomfortable.
Lead Room
Lead Room is the amount of space in the frame in front of your subject. This is important because it allows your subject “lead room” to move into. When editing your footage, you can then pan and follow their movement which gives your video a more polished look.
How much lead room you should have depends on the speed of movement. If your subject is moving slowly, you will need less lead room. If they are moving quickly, you will need more. Experiment and see what looks best for each shot.
Keep in mind that you can always cropped your footage in post-production if you need to crop out some empty space. It’s better to have too much footage than not enough.
Lighting
No matter what type of music video you’re shooting, lighting is key. You need to make sure that your subjects are well lit so that they are visible on camera. If you’re shooting a hip hop music video, you might want to consider using a mix of natural and artificial light. Natural light will give your video a more realistic feel, while artificial light can help you create some unique effects.
Natural Lighting
Natural lighting is one of the most important factors in shooting a hip hop music video. The right lighting can make or break a scene, so it’s important to take the time to find the best location and set up your shots accordingly.
There are a few things to keep in mind when shooting with natural light:
-The time of day will affect the quality of light, so try to shoot during the golden hours (early morning or late afternoon) for the best results.
-Shooting in direct sunlight can create harsh shadows and contrast, so try to find a location that is shady or has diffused light.
-If possible, shoot near a large window or door to take advantage of natural light without having to worry about shadows.
With these tips in mind, you should be able to get some great shots using natural lighting!
Artificial Lighting
Artificial lighting is any light source that is not natural light. This can include things like studio lights, LED lights, and even your smartphone’s flash.
Using artificial lighting to shoot video has several advantages. First, it allows you to control the light, which means you can make it as bright or as dim as you want. Second, artificial lighting can help to improve the look of your video by making it more polished and professional.
However, there are also some disadvantages to using artificial lighting. First, it can be expensive to buy and maintain a good lighting setup. Second, artificial lighting can sometimes create a “flat” look to your video, which can make it less visually appealing.
Audio
In order to make a music video that looks professionally made, it is important to have high-quality audio. This can be difficult to achieve if you are filming in a noisy environment or if the artist is moving around a lot. There are a few things that you can do to make sure that your audio is clear and free of any background noise.
Microphones
There are a few different types of microphones that can be used for shooting hip hop music videos. The type of microphone you use will depend on the style of video you’re shooting and the budget you have.
shotgun microphone – This type of microphone is great for shooting live performances or music videos with a lot of movement. Shotgun microphones are very directional, so they can pick up sound from a distance.
lavalier microphone – This type of microphone is great for shooting interviews or music videos with less movement. Lavalier microphones are small and can be hidden on the subject’s clothing.
handheld microphone – This type of microphone is great for shooting live performances or music videos with a lot of movement. Handheld microphones are easy to hold and allow the subject to move around freely.
Recording Techniques
There are a few key things to keep in mind when recording a hip hop song:
– Make sure the vocalist is dominatant in the mix. The rapper should be front and center, with the instruments reduced in volume so they don’t overpower the vocals.
– Use EQ to control which frequencies are heard most prominently. This can help you achieve a “clean” sound, or emphasize certain elements of the beat.
– Use compression to even out the levels of the track, so that the loudest and quietest moments are closer in volume. This will make the recording sound more polished and professional.
– Pay attention to levels throughout the recording process, so that you don’t end up with clipping (distortion caused by too much volume) or hissing (noise caused by too little volume).