Setting Up Your Home Studio for Electronic Music
Contents
If you’re looking to get into electronic music production, you’ll need to set up a home studio. In this blog post, we’ll give you some tips on how to do just that.

Introduction
If you’re interested in creating your own electronic music, you’ll need to set up a home studio. This can be a simple process if you’re just getting started, or a more complex one if you’re looking to produce professional-quality tracks. In either case, there are some basic pieces of equipment you’ll need to get started.
First, you’ll need a computer. You can use a PC or a Mac, but a Mac is generally considered better for music production. You’ll also need a digital audio interface, which is what allows you to connect your instruments and microphones to your computer. A MIDI keyboard is also helpful for composing and playing back tracks.
Next, you’ll need some software. There are many different programs available for electronic music production, but Ableton Live and Logic Pro X are two of the most popular. You might also want to consider investing in some plugins, which are add-ons that can give you more sounds and effects to work with.
Finally, you’ll need speakers or headphones so you can listen to your tracks as you create them. Choose speakers or headphones that have good bass response, as this will be important for electronic music.
With these basics in place, you’ll be ready to start making your own electronic music at home!
The Room
The first and most important factor when setting up your home studio for electronic music is the room itself. The room will have a huge impact on the quality of your sound. There are a few things you need to take into account when choosing a room for your home studio.
Soundproofing
If you live in an apartment, condo, or house with shared walls, soundproofing is crucial to keeping your neighbors happy and avoiding complaints to your landlord. Even if you live in a single-family home, if your studio is located near a bedroom, nursery, or television room, soundproofing will help keep the peace in your home.
There are several ways to soundproof a room, but the most effective (and expensive) method is to build a dedicated room within your home for your studio. This is often not practical, so the next best option is to use soundproofing materials to treated the existing walls, ceiling, and floors of the room you will be using.
There are many types of soundproofing materials available on the market, but not all of them are effective at blocking out low frequencies (the kind of bass frequencies produced by electronic music). The two most effective types of soundproofing materials are mass-loaded vinyl and acoustic panels.
Mass-loaded vinyl is a heavy sheet of plastic that is installed between your studio and the shared wall. It effectively blocks out low frequencies while still allowing some level of sound to pass through so you can hear what’s going on in the next room.
Acoustic panels are made of fiberglass or other absorbent material and are mounted on walls or ceilings. They are effective at absorbing mid and high frequencies, which will help reduce overall noise levels in your studio.
In addition to using mass-loaded vinyl or acoustic panels, you can also seal any cracks or gaps in doors and windows with weatherstripping or caulk. This will help prevent sound from leaking out of your studio.
Room treatment
Room treatment is one of the most important, and often overlooked, aspects of setting up a home studio. Treating your room will improve the sound of your recordings and make your mixes translate better to other playback systems.
There are a few basic principles to keep in mind when treating your room:
– Absorption: Absorbing sound energy will reduce reverberation time and reduce the level of reflections in the room. This can be accomplished with acoustic panels, bass traps, or even blankets and curtains.
– Diffusion: Diffusing sound energy will help to scatter reflections and prevent build-ups of standing waves. This can be accomplished with diffusors or by placing objects in the room that will reflect sound in multiple directions (e.g., bookshelves).
– Isolation: Isolating your speakers from the rest of the room will minimize the amount of sound energy that is transferred to other surfaces (e.g., walls, floors, ceilings). This can be accomplished with speaker stands or isolation pads.
The Gear
In order to make electronic music, you will need some basic equipment. You will need a computer, music software, a MIDI controller, and audio interface. You may also want to get some speakers, headphones, and other accessories. In this article, we will go over all the gear you need to get started making electronic music.
Monitors
Monitors are one of the most important pieces of gear in your studio, and there are a lot of different types to choose from. You’ll need to consider the size of your room, your budget, and your musical style when choosing monitors.
Active monitors have their own built-in amplifiers, so they’re easy to set up and don’t require a separate amplifier. They’re ideal for small rooms or budgets. Passive monitors need to be connected to an external amplifier, which gives you more control over the sound but can be more expensive.
Studio monitors come in a variety of sizes, from compact “nearfield” monitors that are designed for close listening, to larger “midfield” or “farfield” monitors that are designed for listening at a distance. Nearfield monitors are typically between 4 and 8 inches, while midfield and farfield monitors can be up to 12 inches or more.
The type of monitor you choose will also depend on the music you make. If you make electronic music with a lot of bass, you’ll need a monitor with a good low-end response. If you make acoustic music or play live instruments, you’ll need a monitor with a flat frequency response so you can hear all the details in your recordings.
Microphones
If you’re planning on recording vocals or acoustic instruments, you’re going to need a microphone. There are a lot of different types and brands of microphones out there, so it can be tricky to choose the right one. Here are a few things to keep in mind:
-Do you need a USB microphone or an XLR microphone? USB microphones are plug-and-play, which means they’re easy to set up and use. XLR microphones require an audio interface (more on that later), but they tend to have better sound quality.
-What type of microphone do you need? Condenser microphones are great for recording vocals and acoustic instruments, while dynamic microphones are better for capturing loud sounds like drums or amps.
-How much should you spend? You don’t need to break the bank to get a good quality microphone, but cheaper models will have lower sound quality.
Some great beginner-friendly USB condenser microphones include the Blue Yeti and the Audio-Technica AT2020. If you’re looking for an XLR dynamic microphone, the Shure SM58 is a classic choice that won’t let you down.
Audio interface
An audio interface is a device that connects your instruments, microphones, and other gear to your computer so that you can record and play back digital audio. Audio interfaces come in all shapes and sizes, from simple, inexpensive USB devices to complex multi-channel Thunderbolt units.
Which audio interface you need depends on a few factors:
How many channels do you need? If you only need to record one or two tracks at a time, a 2-in/2-out audio interface will suffice. If you plan on recording an entire band or multiple instruments simultaneously, you’ll need an interface with more inputs.
What type of inputs do you need? If you only need to connect microphones and line-level signals (like from a keyboard), then any audio interface will do. But if you also want to connect instruments directly (like an electric guitar or bass), then you’ll need an interface with instrument inputs.
What resolution and sample rate do you need? If you’re only going to be recording at 44.1 kHz/16-bit (CD quality), then any audio interface will work. But if you want to record at higher resolutions (like 96 kHz/24-bit or even 192 kHz/24-bit), then you’ll need an interface that supports those higher resolutions.
What is your budget?Audio interfaces range in price from around $100 to $2000 or more. Obviously, the more expensive units will offer more features, but don’t necessarily sound better than the less expensive units. It really depends on your needs and budget as to which one is right for you.
Here are some of our favoriteaudio interfaces for electronic music production:
Focusrite Scarlett 2i2 (2nd Gen)
The Focusrite Scarlett 2i2 is a great sounding 2-in/2-out USB audio interface that’s perfect for home studios on a budget. It has two Scarlett mic preamps with 48V phantom power for powering condenser microphones, as well as two line level inputs for connecting keyboards or other line level devices. It also comes with Ableton Live Lite and a suite of plug-ins so you can start making music right away.
An article discussing the different types of roasts available for coffee drinkers
MIDI keyboard
A MIDI keyboard is a essential piece of gear for any producer looking to make electronic music. MIDI is a format that allows electronic instruments and computers to communicate with each other. A MIDI keyboard sends MIDI messages to a computer, which can be used to trigger sounds, record performances, and control parameters in software.
MIDI keyboards come in all shapes and sizes, from small 25-key controllers to larger 88-key models. Some MIDI keyboards also include additional controllers such as faders, buttons, and knobs. These can be used to control various parameters in your music software. In general, the more keys and controllers a MIDI keyboard has, the more expensive it will be.
If you’re just starting out, a small 25-key MIDI keyboard will be sufficient. As you progress, you may want to upgrade to a larger model with more keys and controllers. Ultimately, the best MIDI keyboard is the one that fits your budget and meets your needs.
Drum machine
A drum machine is an electronic musical instrument that creates percussion sounds. Drum machines may imitate drum kits or other percussion instruments, or produce unique sounds. Most modern drum machines allow users to create their own rhythms.
Drum machines are used in a variety of settings, including studios, live performances, and film and television scoring. They are often used as beat makers in music production.
Synthesizer
A good synth is perhaps the single most important piece of equipment in an electronic musician’s arsenal. A synthesizer can imitate the sounds of other instruments or create totally new and unique sounds. There are many different types and brands of synthesizers, so it’s important to do your research before purchasing one.
Analog vs. digital:
Analog synthesizers generate sound using oscillators (which create waveforms) and filters (which shape the waveforms). Analog synthesis is considered to be more organic and ‘warm’ sounding than digital synthesis, which uses computer algorithms to generate sound.
Brand:
There are many different brands of synthesizers on the market, each with their own strengths and weaknesses. Do your research before settling on a particular brand.
Price:
Synthesizers can range in price from a few hundred dollars to several thousand dollars. Again, it’s important to do your research before making a purchase.
The Software
As with any DAW (Digital Audio Workstation), the first thing you need is the software. In this article we’re going to take a look at some of the best options for electronic music production software.
Digital audio workstation
A digital audio workstation (DAW) is a piece of software that allows you to record, edit and mix audio. There are many different DAWs available on the market, but some of the most popular ones include Pro Tools, Logic Pro, Ableton Live and FL Studio.
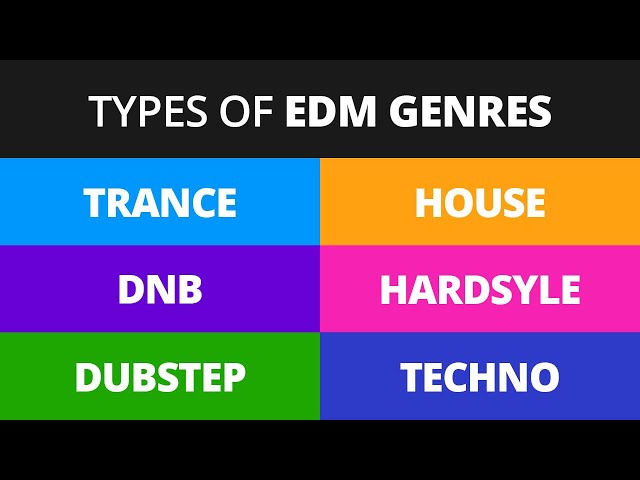
When choosing a DAW, it’s important to consider what kinds of music you want to make and what features you need. For example, if you’re interested in making EDM, then a DAW like Ableton Live or FL Studio would be a good choice because they both have built-in support for creating electronic music. However, if you’re more interested in making traditional sounding music, then something like Pro Tools or Logic Pro would be a better choice.
No matter which DAW you choose, setting up your home studio for electronic music production can be a bit of a challenge. In this article, we’ll give you some tips on how to get started.
First of all, you’ll need to make sure that your computer meets the minimum system requirements for your chosen DAW. If it doesn’t, then your software will likely run slowly or not at all. Once you’ve checked that your computer can handle the DAW you want to use, it’s time to install the software.
Once the software is installed, you’ll need to set up your audio interface. This is a piece of hardware that allows you to connect your microphones and instruments to your computer so that they can be recorded. Many audio interfaces also come with built-in preamps, which can be very helpful in getting quality recordings. If your chosen DAW doesn’t come with an audio interface, there are many different options available on the market from brands like Focusrite, Native Instruments and Yamaha.
Once you’ve set up your audio interface and installed your DAW software, it’s time to start setting up your home studio for electronic music production!
Plugins and virtual instruments
In order to make music on your computer, you will need two things: a music software (DAW) in which to compose, and plugins & virtual instruments to create the sounds. In this article, we’ll focus on the latter.
There are two types of audio files that you can use in your DAW: samples and synthesis. Samples are recorded audio files that you can trigger via MIDI. They can be single shots (such as a kick drum or clap) or loops (such as a drum loop or synth line). Synthesis is the process of creating sounds from scratch using oscillators, filters, and envelopes.
There are many software plugins & virtual instruments available that can be used to create both samples and synthesis. Some popular software instruments include Native Instruments’ Massive, Xfer Records’ Serum, and Image-Line’s Sytrus. These plugins & virtual instruments can be used to create a wide range of sounds, from classic analog synth tones to deep basses and crushing drums. It’s up to you to experiment and find the sounds that you like best.
When choosing software instruments, it’s important to consider both the quality of the sound and the ease of use. Some virtual instruments are very complex and take some time to learn how to use; others are more user-friendly and can be learned fairly quickly. There is no right or wrong answer here – it all comes down to what you’re looking for in a plugin & virtual instrument.
If you’re just getting started in electronic music production, we recommend checking out some of the free plugins & virtual instruments available online. Once you have a good understanding of how they work, you can then start exploring the paid options.
Conclusion
Now that you have your home studio set up, it’s time to start making some music! If you’re new to electronic music production, here are a few tutorials to get you started:
-How to Make a Basic Beat in Ableton Live
-How to Create a Simple Melody in Logic Pro X
-Creating Chord Progressions in FL Studio
Once you’ve got the hang of things, you’ll be able to start creating your own unique tracks. Remember to have fun and experiment with different sounds and ideas. There are no rules in electronic music, so let your creativity run wild!