How to Make Electronic Music on Your Laptop

Contents
Looking to get into electronic music production? Here’s a guide on how to get started making electronic music on your laptop.
Introduction
Electronic music is created using electronic musical instruments and digital audio workstations. It is generally considered to be a subgenre of pop music, but it can also incorporate elements of hip hop, rock, and classical music.
If you want to make electronic music on your laptop, you will need some basic equipment. You will need a laptop with a good processor and plenty of RAM, as well as a soundcard that can handle digital audio. You will also need some software to create your music.
There are many different software programs that you can use to make electronic music. Some of the most popular ones include Ableton Live, Logic Pro, and FL Studio. These programs allow you to create and edit your own sounds, as well as sequence them into songs.
Once you have all of the equipment and software you need, you can start making your own electronic music. If you are new to the genre, it might be helpful to find some tutorials online or in books so that you can learn the basics of how to create your sounds and sequence them into songs. With a little practice, you’ll be making great electronic music in no time!
What You Need
To get started making electronic music on your laptop, you’ll need a few things:
– A laptop with a DAW (digital audio workstation) installed. We recommend FL Studio, Ableton Live, or Logic Pro.
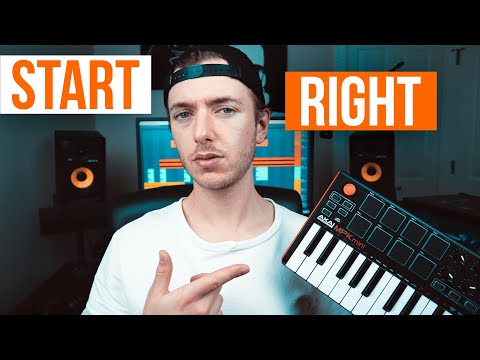
– A MIDI controller. This can be a simple keyboard or something more complex like the Akai MPD26.
– Headphones or speakers to monitor your progress.
Once you have these things, you’re ready to start making music!
Setting Up
The first thing you need is a computer with a good sound card. You will also need some sort of sequencing software. There are many different kinds available, so it is best to try a few out before you decide which one you want to use.
Once you have your software set up, you will need to choose your instruments. For this guide, we will be using virtual instruments, which are played using your computer keyboard. You can also use real instruments, if you have them, by connecting them to your computer using a MIDI interface.
Next, you will need to create some tracks in your sequencing software. Each track should be set up to play a different instrument. For this guide, we will be using four tracks: one for the drums, one for the bassline, one for the lead melody, and one for the chords.
Now you are ready to start making music!
Making a Melody
The most basic element of music is the melody. A melody is simply a series of notes that are played in succession. In order to create a melody, you will need a sound source. This can be either an external keyboard or synth, or a software instrument within your DAW.
Once you have chosen your sound source, you will need to select the notes that you want to use for your melody. This can be done by either playing the notes on your keyboard/synth, or by drawing them in with your mouse on your DAW’s piano roll.
Once you have selected the notes that you want to use, you can then begin to arrange them into a musical phrase. The length of the phrase is entirely up to you, but a good rule of thumb is to aim for around 8-16 bars.
Once you have created your melody, you can then begin to add some additional elements such as chords and basslines. These will help to fill out the sound and make it more interesting.
Adding Bass
Your bassline is the foundation of your track. It’s what gives your music its low-end heft, anchoring the drums and other instruments. Without a strong bassline, your music will sound thin and weak.
Adding bass to your electronic music production can be achieved in a number of ways. The most common method is to use a virtual instrument or synth software program to create and play your basslines. These programs provide you with a wide range of options for creating bass sounds, from simple sine waves to complex multi- oscillator patches.
Another popular method is to use a sample-based bass instrument. These are software instruments that use recorded audio samples of real instruments as their sound source. Sample-based bass instruments are great for emulating the sound of classic analogue synths or real acoustic instruments like electric bass or uprightbass.
Finally, you can also create your own custom bass sounds by processing and layering different audio samples together. This is a more advanced technique, but it allows you complete control over the timbre and character of your bass sound.
Adding Drums
Adding drums to your electronic music is a great way to add energy and excitement. You can create your own drum beats using a drum machine orsampler, or you can use pre-recorded drum loops.
Here are some tips for adding drums to your electronic music:
1. Start with a basic drum beat. A basic drum beat can be created using a kick drum, snare drum, and hi-hat. Start by programming a simple kick-snare-hi-hat pattern into your drum machine or sampler.
2. Add more drums. Once you have a basic beat, you can start adding more drums. Try adding a second kick drum, a tom tom, or a cymbal. Experiment with different sounds and rhythms to find what sounds best with your other instruments.
3. Layer your drums. Layering different drums will give your beats more texture and depth. Try layering different kicks, snares, hi-hats, and percussion instruments to create interesting sound effects.
4. Use effects. Effects like reverb, delay, and EQ can be used to enhance the sound of your drums. Experiment with different effects to find what sounds best with your particular beat.
Arranging and Mixing
The next step is to start putting your ideas together into a song. This process is called arrangement, and it can be one of the most rewarding parts of making music on your laptop. Arrangement is the art of organizing sounds in time to create a musical piece. It involves all aspects of the music, from the overall structure of the song to the specific sound of each instrument.
When you’re just starting out, it’s often helpful to use a pre-made template or drum loop to get your ideas flowing. Once you have a basic idea of how you want your song to sound, you can start adding your own elements one by one. As you add more and more elements, it’s important to keep an eye on the overall mix. This is where you make sure all the different parts of your song are balanced with each other.
If one part of your song is too loud or dominate, it can make the whole thing sound muddy and unclear. On the other hand, if everything is too quiet, it can sound thin and weak. Finding the right balance between all the different elements in your song is an important part of mixing, and it takes practice to get it right. But once you’ve nailed it, your songs will have a professional sheen that will take them to the next level.
Exporting
To export your project, go to File > Export. In the window that opens, select the file format you want to export your project as, then click Export.
WAV is a good choice if you’re planning on burning your project to a CD, or if you need high-quality audio for another purpose. MP3 is a good choice if you want to make your project smaller so you can upload it to the internet, or put it on your phone or other portable device.
Once you’ve selected your file format and clicked Export, choose where you want to save your file, then click Save. Your project will now be exported as an audio file!
Conclusion
We hope this guide has been helpful in getting you started with making electronic music on your laptop! If you have any further questions, please don’t hesitate to reach out to us. And, of course, happy creating!