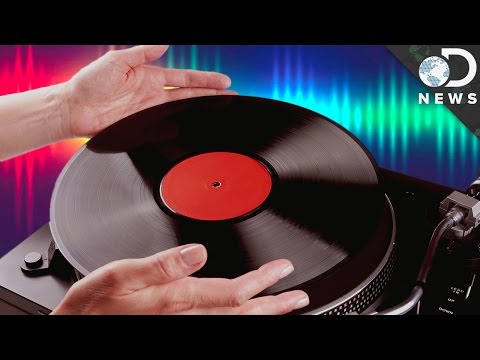
How to Put Music on a Vinyl Record?

Contents
Find out how to put music on a vinyl record with our easy guide. We’ll walk you through the steps of how to choose the right music, transfer it to vinyl, and enjoy your favorite tunes on a classic format.
Introduction
Vinyl records are becoming popular again, but putting music on a record is not as simple as burning a CD. You need the right equipment and materials, and you have to take care to avoid damaging your records. With a little time and effort, you can start enjoying your favorite music on vinyl.
What You’ll Need
If you want to put music on a vinyl record, you’ll need a record player with a built-in phono preamplifier, a stereo receiver or preamplifier with a phono input, an external USB phonograph preamplifier, or a computer with a sound card and software that supports recording from analog inputs. You’ll also need some vinyl records.
Preparing the Record
Before you can begin the process of putting music on a vinyl record, you will need to properly prepare the record. This includes cleaning the record and making sure that there are no dust or debris particles on the surface. If there are any particles on the surface of the record, they could cause scratches on the vinyl during the recording process. Once you have cleaned the record, you will need to apply a release agent to one side of the vinyl. This will help to prevent your music from sticking to the vinyl and making it difficult to remove later. After you have applied the release agent, you will need to place the vinyl onto a turntable and let it spin for a few minutes. This will help to evenly distribute the release agent over the surface of the vinyl.
Recording the Music
Recording the music onto the vinyl record is a process that can be done at home with the proper equipment. The most important piece of equipment you will need is a record cutter, which can be purchased online or at some electronics stores. You will also need a record player and a preamplifier.
Once you have all of your equipment, you will need to set up your record cutter. The first thing you will want to do is clean the cutting head of your cutter with alcohol. Then, you will want to adjust the height of the cutting head so that it is level with the platter of your record player.
Now you are ready to start recording! Begin by playing your record player at a low volume. You will then slowly increase the volume until you reach a comfortable level. Next, use therecord cutter to cut grooves into the vinyl. Be sure to keep a steady hand as you cut!
Once you have finished recording, you will want to clean up your equipment and store it away safely.
Editing the Recording
To edit the recording, you’ll need a computer with a sound editing program installed. Audacity is a free, open-source program that will work just fine for this purpose. Once you have Audacity open, select the portion of the recording you want to use for your vinyl pressing. For best results, you’ll want to choose a section that is no longer than about 15 minutes. If your recording is longer than that, you can always create multiple vinyl pressings.
Mastering the Recording
In order to put music on a vinyl record, the recording must first be mastered. Mastering is the process of preparing the audio for replication, which includes equalization, dynamics processing, and limiting. The mastering engineer will work with the band or producer to create a vinyl master that sounds the best it can.
Once the audio is mastered, it will be sent to a pressing plant where the vinyl records will be made. The pressing plant will create a stamper from the master, which is used to press the vinyl records. The stamper is made by coating metal with a layer of wax, which is then cooled and allowed to harden. The metal stamper is then placed into a mold with hot plastic and pressed. This creates the grooves that will hold the audio on the vinyl record.
After the vinyl records are pressed, they are sent back to the mastering engineer to be inspected. Once they are approved, they are ready to be shipped out to stores or customers.
Printing the Labels
If you are printing your own labels, use a good quality label paper and print with a laser printer. Do not try to print your labels on a regular sheet of copy paper using an inkjet printer; the ink will smear and the labels will not stay on the vinyl.
Applying the Labels
Applying the Labels
Start with the A-side label. Center it on the record, making sure it’s straight. Apply pressure to the entire label until it’s firmly adhered to the record. If you have wrinkles in the label, use a hair dryer on a low setting to carefully heat and smooth them out.
Apply pressure to the entire label until it’s firmly adhered to the record. If you have wrinkles in the label, use a hair dryer on a low setting to carefully heat and smooth them out.
Now do the same with the B-side label. Start by centering it on the record, making sure it’s straight. Apply pressure to the entire label until it’s firmly adhered to the record. If you have wrinkles in the label, use a hair dryer on a low setting to carefully heat and smooth them out.
Storing the Record
To avoid contamination, fingerprints, and other general nastiness, it’s important that you store your records in as dust-free an environment as possible – we recommend using record sleeves. If you’re going to be moving your collection around a lot, or if you’re worried about little fingers getting sticky,Invest in some good quality record boxes – they’ll keep your collection looking pristine for years to come.
Tips and Tricks
There are a few things you need to know before you start putting music on a vinyl record. First, you need to make sure that your record is the correct size. Most records are either 7 or 12 inches in diameter. You will also need to make sure that your needles are the correct size for your record player.
Next, you need to choose the music that you want to put on the record. You can either use an existing song or create your own song. If you are using an existing song, you will need to make sure that it is in a format that can be played on a vinyl record. For example, you will not be able to play an MP3 file on a vinyl record.
Once you have chosen the music, you need to find a place to put it on the record. The best place to put the music is in the middle of the record. This will help to prevent your needle from skipping over the music as it plays.
Now, you are ready to start putting music on your vinyl record!