How to Transfer Music From USB to iTunes on Mac?
Contents
- Introduction
- What you need
- The process
- Tips
- Conclusion
- Introduction:
- If you’re a Mac user and you’ve got music stored on a USB drive, you might be wondering how you can get that music onto your iTunes library. Fortunately, it’s actually quite easy to do. In this article, we’ll show you how to transfer music from USB to iTunes on Mac.
- What you need:
- In order to transfer music from USB to iTunes on Mac, you’ll need the following:
- A USB drive with music stored on it
- A Mac with iTunes installed
- The process:
- Here’s how to transfer music from USB to iTunes on Mac:
- Connect your USB drive to your Mac.
- Open iTunes.
- Click on the “File” menu and then select “Add to Library.”
- Select the USB drive from the list of devices.
- Select the music files you want to add to iTunes and click “Open.”
- The selected music files will now be added to your iTunes library.
- Tips:
- Here are a few tips to keep in mind when transferring music from USB to iTunes on Mac:
- Make sure that your USB drive is formatted as FAT32 or Mac OS Extended (Journaled). If it’s not, iTunes won’t be able to read the files on the drive.
- If you have a lot of music files to transfer, it might be faster to add them to your iTunes library using a tool like Senuti.
- Conclusion:
- Transferring music from USB to iTunes on Mac is easy to do. Just connect your USB drive, open iTunes, and add the files to your library. Keep in mind that your USB drive needs to be formatted as FAT32 or Mac OS Extended (Journaled) in order for iTunes to be able to read it.
If you have music on a USB drive that you want to add to your iTunes library, you can do it fairly easily on a Mac. Here’s how.
Introduction
Are you wondering how to transfer music from USB to iTunes on Mac? It’s actually pretty easy to do! In this article, we’ll show you how to do it in just a few simple steps.
First, you’ll need to connect your USB drive to your Mac. Once it’s connected, open up Finder and click on the “Music” folder in the sidebar. Next, find the songs that you want to transfer over and drag them into the iTunes window. Once they’re in iTunes, you can sync them to your iPhone or iPad by connecting it to your computer and clicking on the “Sync” button. And that’s it!
What you need
In order to transfer music from USB to iTunes, you will need:
-A Mac computer with an USB port
-A USB flash drive containing the music files you want to transfer
The process
Here’s how to transfer music from USB to iTunes on Mac:
1. Connect your USB device to your Mac.
2. Launch iTunes.
3. Click the “File” menu and select “Add to Library.”
4. Navigate to your USB device and select the music you want to transfer.
5. Click “Open” to add the selected music to your iTunes library.
Tips
Whether you have a new Mac or an older one, you might want to know how to transfer music from USB to iTunes. If you have a lot of music on your computer, it can be helpful to transfer it to your iTunes library. This way, you will always have access to your music and can play it on any device that has iTunes installed. Here are some tips for how to transfer music from USB to iTunes on Mac.
1. To get started, open iTunes and go to the Preferences menu.
2. Next, click on the Devices tab and then check the box next to Prevent iPods, iPhones, and iPads from syncing automatically.
3. Now, connect your USB drive to your computer and launch iTunes.
4. Once iTunes has detected your device, click on the Music tab in the sidebar.
5. Make sure that the Sync Music option is checked and then click on the Apply button.
6. Your songs should now start transferring from your USB drive to your iTunes library!
Conclusion
In conclusion, there are a few different ways that you can transfer music from USB to iTunes on Mac. You can use the built-in music import feature in iTunes, you can use a third-party software program like iMyMac Media Converter, or you can use the Terminal app. Each method has its own advantages and disadvantages, so it’s up to you to decide which one is best for your needs.
Introduction:
There are a number of reasons why you might want to transfer music from a USB to iTunes on your Mac. Maybe you’ve just bought a new computer and want to move your music collection over, or perhaps you’ve got music stored on an external drive that you want to be able to access through iTunes. Whatever the reason, it’s actually quite easy to do. In this article, we’ll show you how to transfer music from USB to iTunes on Mac in just a few simple steps.
If you’re a Mac user and you’ve got music stored on a USB drive, you might be wondering how you can get that music onto your iTunes library. Fortunately, it’s actually quite easy to do. In this article, we’ll show you how to transfer music from USB to iTunes on Mac.
Here’s how to transfer music from USB to iTunes on Mac:
1. First, open iTunes and connect your USB drive to your Mac.
2. Next, go to the “Library” tab in iTunes and click on “Music.”
3. Now, click on the “File” menu and select “Add Folder to Library.”
4. Select the folder that contains your music files and click “Open.”
5. Your music should now be added to your iTunes library!
What you need:
In order to transfer music from USB to iTunes, you need the following:
– A Mac with a USB port
– A USB flash drive
– iTunes
Once you have gathered the necessary materials, you can begin the transferring process by following these steps:
1. Open iTunes on your Mac.
2. Connect your USB flash drive to the Mac using the USB port.
3. Click on the “File” menu in iTunes and then select the “Add to Library” option.4. Select the USB flash drive from the list of options that appears and click “OK”.5. iTunes will now scan the contents of the USB flash drive and add any compatible music files to your iTunes library.
In order to transfer music from USB to iTunes on Mac, you’ll need the following:
In order to transfer music from USB to iTunes on Mac, you’ll need the following:
-A Mac computer with iTunes installed
-A USB drive with music files on it
Once you have those two things, you can follow these steps to transfer the music from your USB drive to iTunes on your Mac:
1) Connect the USB drive to your Mac computer.
2) Launch iTunes.
3) Click on the “File” menu in iTunes and select the “Add Folder to Library” option.
4) In the Finder window that appears, navigate to the folder on your USB drive that contains the music files you want to import. Select that folder and click the “Choose” button.
5) iTunes will now import all of the music files in that folder, and they will be added to your iTunes library.
A USB drive with music stored on it
If you have a USB drive with music stored on it, you can transfer the songs to your iTunes library by following these steps:
1.plugin the USB drive into your Mac and open iTunes.
2.Click on the USB drive in the left sidebar under “Locations.”
3.Click on the “Import” button in the top right corner of iTunes.
4.Select the songs you want to import and click “Open.”
5.The selected songs will now be added to your iTunes library.
A Mac with iTunes installed
iTunes is a free piece of software that is made by Apple and is used to play, download and organize different types of media on Mac computers. In order to add music files that are located on a USB memory device, such as an MP3 player or flash drive, to your iTunes Library, you will first need to transfer the files to your computer’s hard drive. From there, you can add the files to iTunes.
The process:
Adding music to your iTunes library from a USB drive is a common way to move music from one Mac to another. You can also use this method to transfer music from your iPhone or iPad to your Mac. The process is simple and only takes a few steps.
1. Connect your USB drive to your Mac.
2. Open iTunes and select Preferences from the iTunes menu.
3. Click the Devices tab and check the box next to “Prevent iPods, iPhones, and iPads from syncing automatically.”
4. Click the OK button to save your changes.
5a. If you’re using macOS Sierra or earlier, make sure the “Copy files to iTunes Media folder when adding to library” option is selected in the General tab of Preferences.
5b. If you’re using macOS High Sierra or later, make sure the “Keep iTunes Media folder organized” and “Copy files to iTunes Media folder when adding to library” options are selected in the Files tab of Preferences.
6a. If you’re using macOS Sierra or earlier, close iTunes and open the Finder .
6b .If you’re using macOS High Sierra or later, select Finder from the Dock and then click on Applications in the sidebar. Scroll down until you find iTunes and double-click it to open it.
7 . In the Finder window that opens, locate your USB drive under Locations in the sidebar on the left (it may be called NO NAME or Untitled). Drag your USB drive icon into the open iTunes window on the right side of the screen. Your music will begin copying into your iTunes library automatically!
Here’s how to transfer music from USB to iTunes on Mac:
With iTunes open and your USB plugged in, find your device in the left sidebar under ‘Devices’.
Click on your device, then click ‘Summary’ in the top left corner.
Under ‘Options’, check ‘Manually manage music and videos’.
Click ‘Apply’.
Now that you’ve enabled manual management, you can drag and drop music from your USB to your iTunes library.
Connect your USB drive to your Mac.
Before you can transfer your music from your USB drive to iTunes, you’ll need to connect the two devices. To do this, simply insert your USB drive into one of the USB ports on your Mac. Once the drive is connected, you should see an icon for it appear on your desktop.
Open iTunes.
Assuming that you have your music files on a USB drive, follow these steps to transfer them to your iTunes library on Mac:
1. Open iTunes. If you’re not signed in, sign in with your Apple ID.
2. Connect your USB drive to your Mac.
3. Click the device icon in the upper-left corner of the iTunes window.
4. Click Summary.
5. Click “Manually manage music and videos.”
6. Click Apply.
7. Click Songs under the Library heading in the left sidebar, then drag and drop the song or songs that you want to add from your USB drive to your iTunes library.
1. Launch iTunes on your Mac and connect your USB flash drive to the computer.
2. Click on the “File” menu and then select “Add to Library.”
3. A new window will appear. Browse for the location of your music files on the USB drive and then click “Open.”
4. iTunes will start importing your music files from the USB drive to the iTunes library.
Select the USB drive from the list of devices.
1. Select the USB drive from the list of devices.
2. If you see a list of songs, select all of them by pressing Command-A on your keyboard.
3. Drag the songs to the iTunes window.
4. When the transfer is complete, you can eject the USB drive safely.
Select the music files you want to add to iTunes and click “Open.”
1. Connect your USB flash drive to your computer.
2. Open iTunes. If you’re using a Mac with macOS Mojave or earlier, use the Finder instead of iTunes.
3. Drag the files and folders that you want to add from the USB flash drive to the iTunes window.
The selected music files will now be added to your iTunes library.
If you have music files on your USB drive that you want to add to your iTunes library, you can do so by following a few simple steps. First, open iTunes and connect your USB drive to your computer. Once your USB drive is recognized by iTunes, click on the “File” menu and select “Add Folder to Library.” Next, navigate to the location of the music files on your USB drive and select the folder that contains them. Finally, click “OK” and the selected music files will now be added to your iTunes library.
Tips:
Here are two methods to help you transfer music from USB to iTunes on Mac.
Method 1: Use Disk Utility
1.Connect your USB flash drive to your Mac.
2.Open Disk Utility, which is in the Utilities folder of your Applications folder.
3.Select the USB drive in the left sidebar, then click the Erase button at the top of the Disk Utility window.
4.In the Format pop-up menu, choose Mac OS Extended (Journaled), then click Erase again to format the drive.
5.Open iTunes, then go to Preferences > Devices and check Prevent iPods, iPhones, and iPads from syncing automatically.
6.Drag and drop the music files from your USB flash drive into iTunes.
Method 2: Use an application like phoneTrans
1.Download and install phoneTrans on your Mac computer.
2Launch phoneTrans, and plug in your USB device to computer with a USB cable.
3Click ” music ” icon on the main interface of phoneTrans, all songs saved on your device will show up on the interface.
4Tick off desired music files, and then click ” To iTunes” button at bottom-right corner to start transferring songs from your device to iTunes Library now!
Here are a few tips to keep in mind when transferring music from USB to iTunes on Mac:
– Use a cable that is compatible with both your USB port and your iPhone or iPad. If you’re not sure which cables to use, check the user manual for your device.
– Make sure that you have the latest version of iTunes installed on your computer.
– If you have a lot of songs, videos, or other files on your device, it might take a while to transfer everything.
– If you see a message that says “iTunes could not copy ‘song name’ to the iPhone ‘device name’ because the file could not be found,” it might mean that the file was moved or deleted from the original location.
Make sure that your USB drive is formatted as FAT32 or Mac OS Extended (Journaled). If it’s not, iTunes won’t be able to read the files on the drive.
Before you begin, make sure that your USB drive is formatted as FAT32 or Mac OS Extended (Journaled). If it’s not, iTunes won’t be able to read the files on the drive.
1. Connect your USB drive to your Mac.
2. Open iTunes.
3. Select “Preferences” from the “iTunes” menu.
4. Click the “Devices” tab.
5. Check the “Prevent iPods, iPhones, and iPads from syncing automatically” box.
6. Click “OK.”
7. Drag and drop the music files you want to transfer from your USB drive into the iTunes window.
8. Eject your USB drive and disconnect it from your Mac when the transfer is complete.
If you have a lot of music files to transfer, it might be faster to add them to your iTunes library using a tool like Senuti.
If you have a lot of music files to transfer, it might be faster to add them to your iTunes library using a tool like Senuti. This will allow you to select all of the music files you want to transfer and add them to iTunes in one go.
Conclusion:
Now that you know how to transfer music from USB to iTunes, you can enjoy your favorite tunes on your computer or mobile device. If you have a large music collection, you may want to consider using a dedicated music management program like iTunes Match orApple Music.
Transferring music from USB to iTunes on Mac is easy to do. Just connect your USB drive, open iTunes, and add the files to your library. Keep in mind that your USB drive needs to be formatted as FAT32 or Mac OS Extended (Journaled) in order for iTunes to be able to read it.
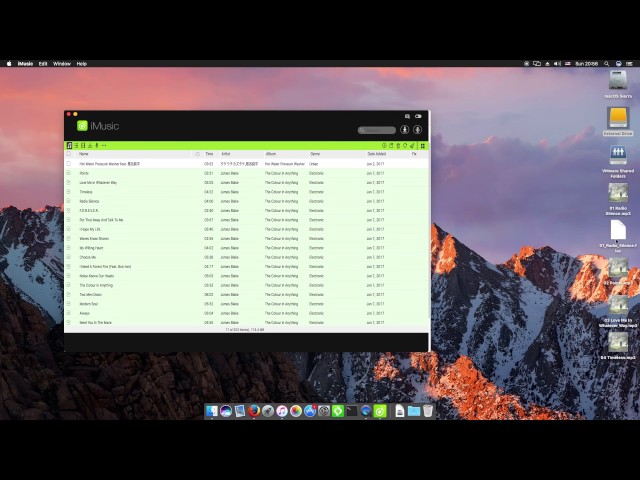
iTunes is a media player, media library, and mobile device management application developed by Apple Inc. It is used to play, download, and organize digital downloads of music and video on personal computers running the macOS and Microsoft Windows operating systems. The application can also be used on iOS devices such as the iPhone, iPad, and iPod Touch.
If you have a USB drive with music files that you want to add to your iTunes library, it’s easy to do. Just follow these steps:
1. Connect your USB drive to your Mac.
2. Open iTunes.
3. In the left sidebar, click on the icon for your USB drive.
4. Find the music files that you want to add to iTunes and drag them into the main window of the application.
5. iTunes will add the files to your library and they will be available for playback in any of your devices that are synced with your iTunes account.