How to Make Dubstep Music
Contents
Want to make your own dubstep music? Check out this blog for a step-by-step guide on how to get started.
Introduction
Dubstep is a type of electronic dance music that originated in South London in the late 1990s. It is characterized by its heavy basslines and rhythmic, syncopated percussion. If you’re interested in making your own dubstep music, there are a few things you’ll need to get started.
What is Dubstep?
Dubstep is a type of electronic dance music that emerged in the early 2000s. It is characterized by its heavy bass, cluttered beats, and eerie sound effects. Dubstep is often associated with the UK grime and dubstep scene, but it has also gained popularity in the US and elsewhere.
If you’re interested in making your own dubstep music, there are a few things you should know. First, dubstep is all about the bass. The bassline is the most important element of a dubstep track, so you’ll need to spend some time crafting a good one. Second, the beats in dubstep are generally very cluttered and complex, so you’ll need to be patient and meticulous when putting them together. Lastly, sound effects are an important part of the dubstep soundscape, so don’t be afraid to experiment with different sounds and effects.
With these things in mind, let’s get started on making some dubstep!
The History of Dubstep
The history of dubstep music is believed to have originated in South London in the late 1990s. The style is a descendant of UK garage and jungle, and shares many similarities with these genres. However, dubstep is distinguished by its heavy basslines and dark, atmospheric soundscapes.
Early dubstep tracks were often characterized by sparse, minimal arrangements featuring long stretches of silence broken up by occasional bass drops. This signature sound was popularized by early pioneers such as Digital Mystikz and Burial. As the genre began to gain popularity in the early 2000s, producer Rusko introduced a more upbeat, party-friendly sound that helped propel dubstep into the mainstream consciousness.
Today, dubstep has evolved into a highly versatile style that incorporates elements from a variety of genres, including hip hop, EDM, and even pop music. While the original purveyors of the genre may have intended it as dark and moody background music for late-night parties, it has since been embraced by mainstream audiences around the world.
The Elements of Dubstep
In order to make dubstep music, you will need to use a variety of different elements. The most important element is the dubstep beat. This is what will drive the entire song and give it its unique sound. Without a solid dubstep beat, your song will not be able to achieve that signature dubstep sound.
Another important element of dubstep music is the use of bass. Dubstep songs are known for their heavy basslines, which add to the overall groove and feeling of the song. If you want to make your song really stand out, you will need to make sure that your basslines are well-written and add something new and unique to the mix.
Finally, another important element of dubstep music is the use of synthesizers and other electronic sounds. These sounds help to create the unique atmosphere that is associated with dubstep music. If you want your song to have that signature dubstep sound, you will need to make sure that you use plenty of synthesizers and other electronic sounds.
How to Make Dubstep Music
Dubstep music is becoming more and more popular, and if you’re a fan of this type of music, you may be wondering how to make it yourself. The good news is that it’s not difficult to create dubstep music if you have the right tools and know-how. In this article, we’ll show you how to make dubstep music using a few simple techniques.
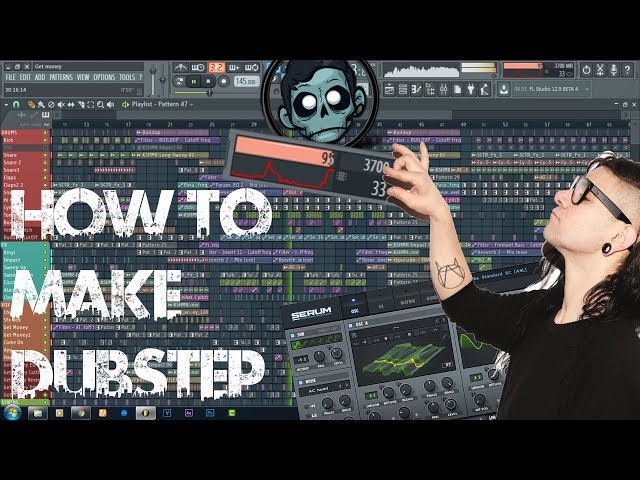
Step 1: Choose Your Software
The first thing you need to do when learning how to make dubstep music is to choose your software. There are a variety of options out there, but we recommend using FL Studio. Once you have FL Studio installed, you should also download a few plugins to help you with the production process. We recommend using the following plugins:
-Xfer Serum
-Nexus 2
-Massive
-Omnisphere
These are just a few of the plugins that we recommend, but feel free to experiment with different ones to find what works best for you.
Step 2: Choose Your Samples
Carefully choosing your samples is one of the most important steps in makingDubstep music. You want to make sure that the samples you choose fit well together and complement each other. There are a few things you should keep in mind when choosing your samples:
-The tempo of your samples should be around 140 BPM.
-Your samples should be in time with each other.
-The key of your samples should be compatible.
-Your samples should have a similar feel or vibe.
Step 3: Create the Drum Pattern
Now that you have your drum sound, it’s time to start creating the drum pattern. Start by opening up your DAW or beat making software and creating a new project. Then, create a new MIDI track and load a drum instrument.
To create the actual drum pattern, you’ll first need to decide on the tempo of the track. Most dubstep tracks fall between 140 and 150 BPM. Once you’ve decided on the tempo, set your metronome or click track to that tempo.
Now it’s time to start programming in your drum pattern. For this example, we’ll start with a simple 4/4 drum pattern. The first beat will be a kick drum on the 1 and 3, followed by a snare on the 2 and 4. Fill in the rest of the measure with hi-hats on every 8th note. Your finished measure should look something like this:
KICK | SNARE | HAT | HAT | HAT | HAT | HAT | HAT
|—–|——-|——-|——-|——-|——-|——-|——-|
1 e & # a 2 e & # a 3 e & # a 4 e & # a
Once you have your basic drum pattern programmed in, it’s time to start adding in some variations. For this example, we’ll add in a few accents on different drums within the measure. We’ll also add in an open hi-hat on beat 4 and close it on beat 1 of the next measure. Your finished drum pattern should look something like this:
KICK | SNARE | HAT | HAT | HAT | HAT | HAT | HAT
|—–|——-|——-|——-|——-|——-|——-|——-|
1 e & # a 2e & #a 3e& #a 4e& #a 1e&
#a
2e 3e 4e&xc
Step 4: Create the Bassline
Now that you’ve got your drum track laid down, it’s time to start working on the bassline. Start by opening a new instance of your DAW’s piano roll editor. If you’re not sure how to do this, consult your DAW’s documentation.
Once you have the piano roll editor open, you’ll need to choose a bass sound. For this tutorial, we’ll be using a simple sine wave. But feel free to experiment with different sounds to see what you like best.
Now it’s time to start creating your bassline. Start by CREATING A SIMPLE MELODY that outlines the chord progression of your song. Don’t worry too much about making it perfect – we can always go back and tweak it later. Once you have a basic melody worked out, try adding some variation by adding in some Eighth note triplets orSixteenth notes.
Finally, once you’re happy with your bassline, add in some effects to give it more character. Experiment with different effects until you find something you like. Reverb and delay are always good choices for dubstep basslines.
Step 5: Create the Lead Synth
Now it’s time to create the lead synth. This will be the main melody of the song, so it’s important to make it sound good.
First, open up a new instance of your DAW.Create a new MIDI track, and add a soft synth to it. I’m using Sylenth1 for this tutorial, but you can use whatever you like.
Next, open up the synth and create a simple sawtooth wave. adjusting the cutoff and resonance to taste. Then, add some reverb and delay to give it a more spacious sound.
Now that you have your lead sound, it’s time to start programming the melody. If you need some help with this, check out our guide on how to write melodies.
Step 6: Add the Effects
Now that your track is finished, it’s time to add some effects. The two most common effects used in dubstep are reverb and delay. You can add these effects using any audio editing software.
Reverb addsecho and space to your track, making it sound larger and more dramatic. To add reverb, first send your track to a aux channel. Then apply a reverb effect to the aux channel. Adjust the mix and decay time to taste.
Delay is another popular effect used in dubstep. It adds aecho to your track, giving it a more spacious sound. To add delay, send your track to an aux channel and apply a delay effect to the aux channel. Adjust the feedback, mix, and time to taste.
Conclusion
In conclusion,Dubstep music can be difficult to produce, but with a bit of practice, you can create your own professional sounding tracks. Use the tips and techniques outlined in this article, and don’t be afraid to experiment. With a little time and effort, you’ll be making Dubstep music that will make your friends want to dance all night long.