Making Electronic Music for Beginners: The Ultimate Guide
Contents
This guide will show you how to get started making electronic music, regardless of your experience level. We’ll cover the basics of what you need to get started, and give you some tips and tricks for making quality music. By the end of this guide, you’ll be ready to start making your own electronic music!

Introduction
If you’re reading this, it’s safe to assume that you’re interested in making electronic music. Maybe you’re a total beginner, or maybe you’ve dabbled here and there but never took the plunge. Either way, we’re glad you’re here.
In this guide, we’re going to take you through everything you need to know to get started making electronic music. We’ll tell you what equipment you need, how to get started with the basics of composition, and we’ll even give you some tips on how to stand out from the crowd.
So whether you want to make EDM, IDM, techno, house, dubstep, or anything in between, this guide will give you the foundation you need to get started. Let’s jump in!
What You Need to Know Before You Start
Before you start making electronic music, it is important to know what you need in order to get started. This guide will tell you everything you need to know before you start making electronic music. You will need a computer, a DAW, plugins, and samples.
What is electronic music?
Electronic music is a genre of music that is produced with the help of electronic musical instruments or digital music technology. It has a wide range of subgenres and styles, which can often be distinguished by their use of synthesizers, drum machines, and knives.
In the early 2010s, electronic dance music (EDM) became popular in the mainstream. In general, EDM is characterized by a heavy use of synthetic sounds and effects, which are often created with the help of computers and electronic instruments.
However, not all electronic music is dance-oriented. There are many different types of electronic music, which can be categorized according to their tempo, style, or overall sound. For example, hip hop and trip hop are both subgenres of electronic music that are known for their relaxed tempos and laid-back beats.
What do you need to make electronic music?
In order to make electronic music, you will need some sort of audio production software. This could be a simple, free program like Audacity, or a more complex program like Ableton Live or Logic Pro. You will also need a computer on which to run your software, and speakers or headphones to listen to your work. If you want to record your own sounds, you will need some sort of audio interface and microphone. Finally, you’ll need some patience and creativity!
What are the different genres of electronic music?
There are countless genres of electronic music, and new subgenres are constantly emerging. Some of the most popular genres include techno, house, drum & bass, dubstep, and trance. However, electronic music is often classified by its tempo (measured in beats per minute, or BPM) rather than its genre. For example, most trance tracks fall between 130-160 BPM, while most dubstep tracks fall between 140-180 BPM.
The Basics of Making Electronic Music
If you’re interested in making your own electronic music, you may be wondering where to start. This guide will cover the basics of making electronic music, from choosing the right equipment to creating your first track. By the end of this guide, you’ll have all the knowledge you need to get started making electronic music.
Step 1: Choose a DAW
In order to make electronic music, you need a digital audio workstation (DAW). This is the software that you will use to create, record, and produce your music. There are many different DAWs available on the market, so it is important to choose the one that is right for you.
Some of the most popular DAWs include Ableton Live, Logic Pro X, Pro Tools, FL Studio, and Reason. Each DAW has its own unique interface and features, so it is important to do some research before making your decision. You may also want to try out a few different DAWs before settling on one.
Step 2: Choose Your Samples
In electronic music, a sample is a recording of a sound that you can upload into your DAW and play back as part of your song. Many producers like to use pre-recorded samples because they provide an easy way to add interesting sounds to their tracks without having to record them from scratch.
There are two main types of samples that you’ll encounter: one-shots and loops. One-shots are single recordings of a sound, like a drum hit or a vocal phrase. Loops are recordings that have been edited to loop seamlessly so that they can be repeated endlessly. When you’re choosing samples for your track, it’s important to consider what role the sample will play in the song. For example, if you’re looking for a lead vocal sample, you’ll want to find something that has a strong melody and stands out from the rest of the track. On the other hand, if you’re looking for a background sample, you might want something that is more subdued and blends into the track more easily.
There are plenty of places to find samples online, but it’s important to make sure that you have the right licenses for any samples that you use in your tracks. Some producers choose to create their own samples by recording sounds from their environment or using software instruments, while others prefer to purchase sample packs from reputable sources. Regardless of where you get your samples from, it’s important to make sure that you have the appropriate licenses before using them in your music.
Step 3: Create a Drum Loop
Now that you have your hardware and software set up, it’s time to start making some noise! In this section, we’ll walk you through the basics of creating a drum loop.
Before you start, it’s important to understand the concept of a loop. A loop is a repeating section of audio that can be any length, but is usually between 1 and 8 bars. Once you’ve created a loop, you can play it back over and over again to create a longer track.
One of the easiest ways to create a loop is to use a drum machine or drum sequencer. A drum machine is an electronic device that allows you to create and play back drum beats. There are many different types of drum machines, but they all essentially work in the same way: you select the type of sound you want (kick drum, snare, hi-hat, etc.), choose how long you want each sound to last, and then hit the “play” button. The result is a repeating pattern of sounds that you can layer with other instruments to create a full song.
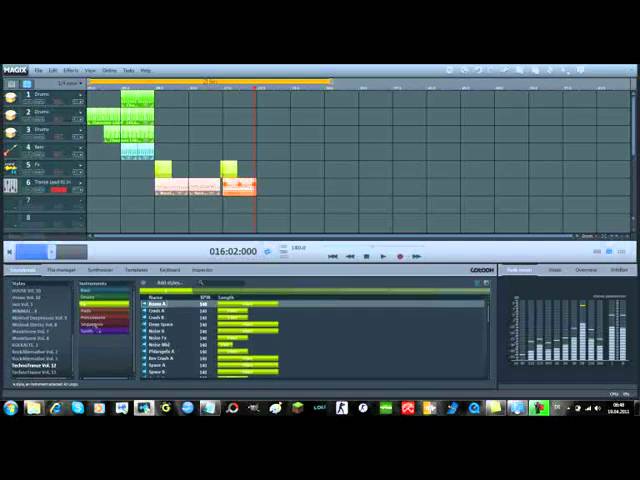
Drum sequencers work in a similar way, but instead of using physical drums, they use samples of real drums that have been recorded into the software. This gives you more flexibility in terms of the sounds you can use, but it can also be more confusing for beginners. In this guide, we’ll be using Ableton Live Lite, which is a popular music production software that comes with a built-in drum sequencer called Drum Rack.
To get started, first launch Ableton Live Lite and create a new project. Then open Drum Rack by going to the “Instruments” tab in the browser and double-clicking on “Drum Rack”. This will open up a new window with all of the different drum sounds that are available in Drum Rack. For this example, we’ll be using the kick1 sound from the “Club Drums 1” preset. To select this sound, simply click on its name in the list (it should turn blue when selected).
Next, go to the “Sequencer” tab at the bottom of Drum Rack and click on the “Kick1” track so that it is highlighted in blue. This will cause all of the controls for Kick1 to appear on the right side of Drum Rack. To change the length of Kick1 so that it plays for two beats instead of one beat, click on “2n” next to “Length” (this stands for “ notes”). You should see Kick1 get longer in Drum Rack so that it spans two beats instead of one beat.
Now let’s add some variation to our kick drum by adding another sound on top of it. For this example, we’ll use the snare1 sound from Club Drums 1 preset. To select this sound, go back to the list in Drum Rack and click on its name (it should turn blue when selected). Then go back to Sequencer tab and click on empty space next to where Kick1 starts playing so that Snare1 gets added right after Kick1 plays When you do this correctly Snare1 track should appear highlighted in blue right nextto Kick1 track.”
Step 4: Create a Bassline
Now that you’ve got a kick and a snare, it’s time to create a bassline. A good rule of thumb is to keep things simple at first, so don’t worry about getting too creative here. Just choose a basic bass sound and sketch out a simple pattern that complements the drums.
To create a bassline, you’ll need a synth plugin or VST. If you’re not sure where to start, check out our list of the best free synth plugins.
Once you’ve chosen a synth, load it up in your DAW and begin by creating a simple four-bar loop. Start by incorporating the root note of the chord progression you’re using. For example, if your progression is in C major, your root note will be C3. From there, experiment with different notes in the scale until you find something that sounds good.
Once you’ve found a few notes that work well together, it’s time to start shaping your bassline. Begin by adding some variation to the notes you’re using. For example, if you’re playing C3 on the first and third beats of each bar, try playing C3 on the first beat and C4 on the third beat. You can also add embellishments like slides or vibrato to make your bassline more interesting.
Once you’re happy with your bassline, it’s time to add some effects. A good place to start is with a bitcrusher or distortion effect to give your bassline some grit. You can also experiment with different reverb and delay settings to create more space in your mix.
Step 5: Create a Lead Synth
The lead synth is the part of the song that really stands out and grabs your attention. It’s usually the melody, but it can also be a counter-melody or just a really catchy phrase. Creating a lead synth is all about finding the right sound. You can use any synth you want, but I recommend using one that has a lot of modulation options so you can really tweak the sound and make it your own.
Once you’ve found the right sound, it’s time to start creating your melody. If you’re not sure what notes to use, try starting with a major or minor scale. You can also use chord progressions to come up with melodic ideas. Once you have a few ideas, start piecing them together into a cohesive phrase. Pay attention to the overall structure of the song and where your lead synth fits in. Make sure each note sounds good and flows nicely into the next one.
Once you have a complete melody, it’s time to start adding effects. Reverb and delay are two of the most commonly used effects in electronic music, so definitely experiment with those. But don’t be afraid to try out other effects like chorus, flanger, and phaser. Experiment until you find something that sounds good and enhances your melody without overshadowing it.
Step 6: Arrange Your Track
Now that you’ve recorded all of your musical parts, it’s time to arrange them into a finished song. This is where you’ll decide the order of the sections (verse, chorus, bridge, etc.), and how many times each section will be repeated.
The arrangement of a song can have a big impact on how catchy and memorable it is. For example, if you put the chorus at the beginning of the song, listeners will be able to remember it more easily. On the other hand, if you save the chorus for the end, it will make more of an impact.
There are no hard and fast rules for arranging a song, so experiment and see what sounds best to you. You can always rearrange things later if you change your mind.
Once you’ve decided on an arrangement, it’s time to add some final touches to your track. This might include adding effects like reverb or delay, or automating the level of certain parts so that they become louder or softer at certain points in the song.
Step 7: Mix Your Track
The mixing stage is where you put all the pieces of your track together and balance the levels of each element to create a cohesive whole. This is a critical step in the production process, and one that can take quite a bit of time and effort to get right.
There are a few key things to keep in mind when mixing your track:
-Your goal is to create a balance between all of the elements in your track, so that none of them are too loud or too quiet.
-You want to make sure that each element can be heard clearly, without being drowned out by other elements.
-The overall mix should sound good at different volumes, from very soft to very loud.
To mix your track, start by setting the levels of each element using a mixing console or digital audio workstation (DAW). Pay attention to the overall balance of the track as you adjust the levels, and make sure that none of the elements are too loud or too quiet. Once you have the levels set, you can start adjusting other aspects of the mix, such as EQ (equalization) and panning (placing elements in different parts of the stereo field).
Remember, take your time and experiment with different settings until you find what sounds best. There is no one “right” way to mix a track – it’s all about what sounds good to you.
Step 8: Master Your Track
Now that you’ve mixed and edited your track, it’s time to master it. Mastering is the process of finalizing your track, making sure it sounds as good as possible and is ready for release.
There are a few things you’ll want to do when mastering your track:
1. Listen to your track on multiple speakers and headphones. This will help you catch any mix issues that you may have missed.
2. Boost the highs and lows slightly with an equalizer. This will help your track sound fuller and more polished.
3. Compress the overall level of your track. This will even out the volume of your track and make it sound more consistent.
4. Add some limiting to the overall level of your track. This will make sure your track doesn’t clip when played loudly and will help it sound louder overall.
5. Listen for any background noise or hums that may be present in your track. If you hear any, use a noise gate or an equalizer to reduce or remove them.
6. Make sure your levels are peaking at around -3 dBfs (decibels below full scale). This will give you headroom to work with when exporting your track later on.
7 .Export your track as a 16-bit, 44kHz WAV file . This is the standard format for exporting audio and will be compatible with all audio applications and devices
Conclusion
We hope you enjoyed this guide to making electronic music for beginners! While it may seem like a daunting task at first, with a little practice and patience you’ll be churning out catchy tunes in no time.
Remember to have fun with it and experiment with different sounds and rhythms to see what you can come up with. There are no rules when it comes to making music, so go wild and let your creativity flow!