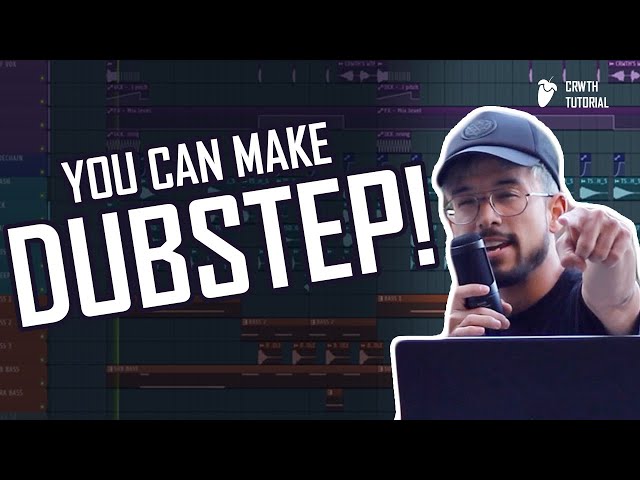
How to Make Dubstep Music with Programming Instruments
Contents
If you’re looking to get into making dubstep music, you’re going to need some programming instruments. This guide will show you how to make dubstep music with programming instruments.

Introduction
In this guide, we’ll show you how to make dubstep music with programming instruments. Dubstep is a genre of electronic dance music that originated in the United Kingdom in the late 1990s. It is characterized by its heavy bass and percussive sound, and often features complex drum patterns.
What You Will Need
In order to make dubstep music with programming instruments, you will need a computer with an Internet connection, a software program that allows you to create and mix sounds (such as Audacity), and a pair of headphones or speakers. You may also want to find some free online tutorials or ask a friend who is familiar with music production for help.
Step One: Choose Your Software
The first step to making Dubstep music with programming instruments is to choose your software. There are a variety of software programs available, each with its own strengths and weaknesses. Select a program that you are comfortable using and that offers the features you need to create the type of music you want to make.
Once you have chosen your software, familiarize yourself with its features and capabilities. Read the manual or watch tutorial videos to learn how to use the various tools and functions. Experiment with the different sounds and effects to get a feel for what is possible.
Step Two: Choose Your Samples
The next step is to choose your samples. These can be found online or you can create your own. To create your own, you will need a microphone and an audio editing program. Once you have your samples, you will need to import them into your music production software. In most cases, you will want to use WAV files.
Step Three: Create Your Drum Pattern
Now that you have your basic melody, it’s time to add some drums. For our drum pattern, we’ll use a 4/4 kick on beats 1 and 3, a snare on beat 2, and a hi-hat on beats 4 and 8.
To program this in, first open up your drum machine. We’ll be using the drum machine in Ableton Live 9 for this tutorial, but any drum machine will do.
Once you have your drum machine open, create a new instrument track by clicking the “Create New Track” button. Then, select “Drum Machine” from the drop-down menu.
Next, select the kick drum sound that you want to use. For our kick drum, we’ll be using the “808 Kick” sound from Ableton’s Drum Rack.
Once you’ve selected your kick drum sound, program in a 4/4 kick pattern on beats 1 and 3. Be sure to set the volume of your kick drums so they’re not too loud or too soft – you want them to sit nicely in the mix without overpowering the other elements of your song.
Next, add a snare drum on beat 2. Again, be sure to set the volume so it sits nicely in the mix.
Finally, add a hi-hat on beats 4 and 8. Close hi-hats work well for dubstep, so choose a sound that has a nice “chick” sound when it’s played at a moderate tempo.
Step Four: Create Your Bassline
Now that you have your melody and drums, it’s time to create a bassline. In dubstep, the bassline is often the most important part of the song. It’s what drives the song forward and gives it its energy.
There are a few things to keep in mind when creating your bassline. First, you want to make sure that it’s in sync with the drums. Alternatively, you can create a separate bass drum track that plays along with the drums. This will give your bassline more punch.
Next, you want to make sure that your bassline complements the melody. It should never steal the show, but rather support it. A good way to do this is to create a counter-melody that goes against the grain of the main melody. This will add interest and depth to your song.
Finally, don’t be afraid to get creative with your sound design. Dubstep is all about getting experimental with sound, so don’t be afraid to push boundaries. Try using different synthesis techniques, or even recording real-world sounds and processing them through effects. The sky’s the limit!
Step Five: Create Your Lead
Now that you have your basic drum track, it’s time to add a lead. The lead will be the main melody of your song, and everything else will revolve around it.
There are a few different ways to create a lead. The most common way is to use a synthesizer, but you can also use samples, or even create your own sounds with programming instruments.
If you’re using a synthesizer, you’ll need to choose a sound that you want to use as your lead. There are a lot of different sounds that you can choose from, so take some time to experiment until you find one that you like.
Once you’ve chosen your lead sound, it’s time to start creating your melody. Start by coming up with a simple hook that you can repeat throughout the song. Then, add in some variation by changing up the notes that you’re playing.
You can also add effects to your lead sound to make it more interesting. For example, try adding a bit of reverb or delay. Experiment with different effects until you find something that sounds good.
Once you have your lead hook and melody down, it’s time to start programming it into your software instrument. Start by creating a simple 4-bar loop. Then, add in your hook and melody. Once you have those down, start adding in some variation by changing up the notes that you’re playing.
Keep adding more and more bars to your loop until you have something that sounds good. Then, all that’s left to do is add in some flourishes and embellishments to make your lead sound more interesting. Add in some slides, bends, or vibrato for starters.
Step Six: Arrange Your Song
The arrangement is essentially the song’s “form.” It’s how you take the various sections of your song (intro, verse, chorus, bridge, etc.) and put them together in a certain order to create the overall structure of the song. The arrangement can make or break a song, so it’s important to spend some time on it and get it right.
There are a few things to keep in mind when arranging your dubstep song:
-The drops should be spaced out evenly throughout the song. You don’t want them all bunched up at the beginning or end.
-Make sure the buildups are long enough to get the listener hyped up for the drop. If they’re too short, the drop will lose its impact.
-Depending on the length of your song, you may want to include multiple drops and buildups.
-Ending your song with a big drop is always a good idea. It’ll leave the listener wanting more!
Step Seven: Export Your Song
Now that you have your song arranged the way you want it, with all the tracks mixed together, it’s time to export it as an MP3. In Reaper, go to File->Render.
In the window that pops up, make sure that “MP3” is selected as the file format at the top. Then, click on the button labeled “Render all tracks…” in the middle of the window.
In the next window that pops up, choose a location to save your file and hit “Save.” Your song will now render as an MP3.
Conclusion
Making dubstep music with programming instruments can be a fun and rewarding experience. By following the tips outlined in this article, you will be well on your way to creating your own dubstep tracks. With a little practice, you will be able to create music that is professional sounding and will make your friends and family proud.