Reaper: Writing Basic Electronic Dance Music Examples

Contents
This guide will teach you the basics of writing a Reaper project file for an electronic dance music track. You will learn how to set up your project, add audio and MIDI files, and mix and render your track.

Introduction
This guide will show you how to create basic electronic dance music using the Reaper digital audio workstation. You will need a MIDI controller and a few software plugins to get started.
What is Reaper?
Reaper is a powerful digital audio workstation that enables you to record, edit, mix and master audio files with a few simple clicks. It’s also an excellent platform for writing electronic dance music, thanks to its wide range of built-in instruments and effects.
In this article, we’ll take a look at how to write basic electronic dance music using Reaper. We’ll start with a basic drum beat, then add some bassline and melody parts. By the end, you’ll have everything you need to write your own dance track!
Setting up Reaper
In order to get started with writing Electronic Dance Music (EDM) in Reaper, you will need to first set up your project correctly. If you have not done so already, please read our guide on How to Set Up a Project in Reaper.
Reaper is an incredibly powerful and versitile DAW, but for the purposes of this tutorial we will only be using a few of its features. We will be using virtual instruments to create our music, so we won’t need any audio tracks. We will also not be using any MIDI hardware, so we don’t need to set up any MIDI inputs or outputs.
With that said, let’s get started!
1. Open Reaper and create a new project.
2. In the New Project window, make sure that the “Enable Timeline Input” and “Enable Track Output” options are both unchecked:
3. Click “OK” to confirm your settings and create the new project.
4. You should now see an empty Reaper project:
5. The next thing we need to do is add some virtual instruments to our project. In this tutorial, we will be using two instruments:
– A kick drum (to keep the rhythm)
– A lead synth (to play the melody)
Your first project
Now that you have Reaper open and ready to go, let’s start by creating a new project. Click on the “File” menu item at the top of the screen, then choose “New Project…” from the drop-down menu that appears. A new window will appear, asking you to name your project and choose where you want to save it. For now, just name it “My first project” and click “Save”.
Recording audio
In this tutorial, we’ll be discussing how to record audio in Reaper. We’ll go over setting up your audio hardware, recording a basic track, and adding effects.
Reaper is a powerful digital audio workstation (DAW) developed by Cockos Incorporated. It’s widely used by professional and hobbyist musicians alike for its low price, ease of use, and wide range of features.
In order to start recording audio in Reaper, you’ll need to have an audio interface connected to your computer. This is what allows you to connect microphones and other instruments to your computer so that they can be recorded.
Once you have your audio interface set up, you’ll need to create a new track in Reaper. To do this, go to the “Track” menu and select “Insert new track”.
In the next window, select “Audio track” from the “Type” drop-down menu. Then, click “OK”.
Now that you have a new track set up, it’s time to start recording! Make sure that your input device is selected in the “Input” drop-down menu and then press the “Record” button on the track panel (the big red button). You can also start recording by pressing the spacebar on your keyboard.
Once you’re finished recording, press the “Stop” button on the track panel or press the spacebar again. Your newly recorded track should now appear in the track list on the left side of the Reaper window. Next up, let’s add some effects!
Editing audio
In this section, we’ll go over some basic editing techniques for audio in Reaper. These techniques can be applied to a variety of genres, but we’ll focus on electronic dance music (EDM) as an example.
First, let’s talk about cutting and pasting. To cut a section out of an audio track, first select the section you want to remove with your mouse. Then, press the “cut” button on your keyboard (usually “ctrl+x” or “command+x”). To paste the cut section somewhere else, first select where you want to paste it, then press the “paste” button on your keyboard (usually “ctrl+v” or “command+v”).
Next, let’s talk about fades. A fade is when the volume of an audio track gradually goes up or down. To create a fade-in (a gradual increase in volume), select the area you want to fade-in with your mouse, then click the “fade-in” button in Reaper. To create a fade-out (a gradual decrease in volume), select the area you want to fade-out with your mouse, then click the “fade-out” button in Reaper.”
MIDI
MIDI, or Musical Instrument Digital Interface, is a standard protocol for communication between musical instruments, computers, and other electronic devices. It is typically used for creating and playing back music.
Reaper is a digital audio workstation (DAW) that can be used for composing, recording, mixing, and editing audio. It supports a variety of plugins and file formats, making it a versatile tool for producing music.
This guide will show you how to set up Reaper and write some basic electronic dance music examples using MIDI.
First, you will need to download and install Reaper. You can get it here: http://www.reaper.fm/download.php
Once you have installed Reaper, launch it and create a new project.
Synthesis
Synthesis is the production of waveforms using oscillators. These waveforms can be manipulated to create different sounds by changing their shape, pitch, and duration. The most common type of synthesis is subtractive synthesis, which uses oscillators to create waveforms that are then filtered to remove certain frequencies. Additive synthesis is another type of synthesis that involves adding together multiple waveforms to create more complex sounds. Granular synthesis is a type of synthesis that involves breaking up sounds into small grains and then manipulating those grains to create new sounds.
Effects
The best way to get started with writing Electronic Dance Music is to use an audio effects processor. Many of these devices come with a wide variety of options for manipulating your sound. By using an effects processor, you can change the tempo, pitch, and timbre of your music. You can also add effects such as reverb and delay.
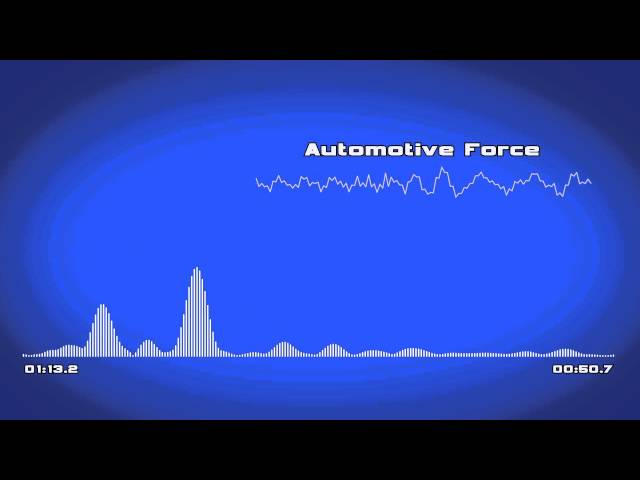
Rendering and exporting
In Reaper, “rendering” means to create a new audio file from an existing one, using some kind of processing. This could be anything from simple effects like EQ or crossfading, to very complicated melding of many different audio files. The simplest form of rendering is just exporting channel audio. This copies all the audio on a given channel to a new file. You can do this by right-clicking on the channel name and selecting “Render channel”.
You can also render the whole project at once by going to File->Render->Project straitght to disk. This will mix down all the channels into a single stereo file, applying any effects and automation that you have in place. If you want to export each channel as its own separate file, you can do that too! Just select “Split tracks while rendering”.
There are many other options available in the render dialog, so make sure to explore them and see what works best for you.
Conclusion
In conclusion, Reaper is a powerful and user-friendly DAW that is perfect for producing electronic dance music. With its extensive MIDI and audio editing capabilities, Reaper gives you the ability to produce professional sounding tracks quickly and easily.