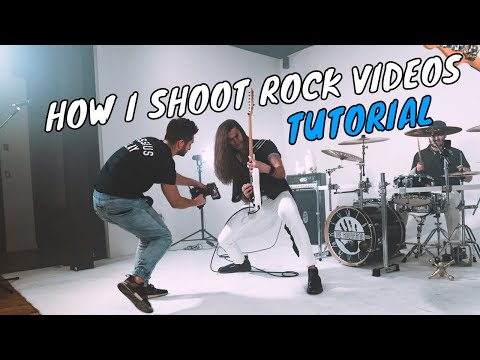
Shooting Heavy Metal Music Videos

A heavy metal music video is a piece of art. It’s a chance to show the world your creative vision, and it’s also a lot of fun. If you’re a fan of metal music, then you know that a good music video can make or break a band.
The Camera
It takes a lot of skill to shoot a heavy metal music video. The first thing you need is a good camera. You can’t just use any old camera; it has to be one that can handle low-light and fast-moving subjects. It also needs to be able to take high-quality video.
Get a DSLR camera that can shoot in 4K
DSLR cameras have advanced a great deal in recent years and now offer features that were once only available on professional video cameras. One of the most important features for shooting music videos is the ability to shoot in 4K. This allows you to capture a lot of detail and create stunning visuals. The other benefit of shooting in 4K is that it gives you the ability to zoom in and crop your footage without losing any quality. This is essential for getting close up shots of the band without having to use a separate camera.
There are a few different manufacturers that offer 4K DSLR cameras, but we recommend the Canon EOS 1D X Mark II. This camera is capable of recording 4K video at up to 60fps, which will allow you to capture smooth footage even when the band is playing fast songs. It also has excellent autofocus capabilities, so you won’t have to worry about your shots being out of focus.
Get a wide angle lens
For metal music videos, you’re going to want to get a wide angle lens. This will help you capture the magnitude of the mosh pit and the stage. If you’re shooting on a cropped sensor camera, something like a Tokina 11-16mm f/2.8 would be perfect. For full frame cameras, you might want to consider a Sigma 20mm f/1.4 or even a Rokinon 14mm f/2.8 if you’re on a budget.
Get a fast prime lens
If you’re shooting heavy metal music videos, you’ll need a fast prime lens to get the most out of your camera. A fast prime lens is one that has a maximum aperture of f/2.8 or wider. This allows you to shoot in low light conditions and still get great results.
There are a few things to keep in mind when shopping for a fast prime lens. First, make sure that the lens is compatible with your camera. Second, take into account the focal length of the lens. A longer focal length will allow you to shoot in tighter spaces, while a shorter focal length will give you more flexibility. Finally, consider the price of the lens. Fast prime lenses can be quite expensive, so be sure to shop around and compare prices before making your final decision.
The Lighting
Achieving the best results for your heavy metal music video shoot comes down to nailing the lighting. This can be difficult, as you need to capture both the fast-paced energy of the performance while still maintaining the quality of the image. Here are some tips to help you get the perfect lighting for your heavy metal music video.
Natural light
While you can use natural light to shoot a music video, it will require more planning and effort to make sure that the lighting is right. Natural light can be very beautiful, but it can also be harsh and unkind to the subjects in your video. If you’re shooting outdoors, try to find a location that has some shade so that the light is softer and less harsh. You can also use reflectors to give your subjects a little bit of extra light.
When shooting indoors, you’ll need to be even more careful with your lighting. Make sure to shoot during the day so that there is plenty of natural light coming in through the windows. You can supplement this with additional lights, but be careful not to make the video look too “lit.”
Continuous lighting
There are two ways to light a music video: natural lighting and continuous lighting. Natural lighting is when you use the sun or other light sources that already exist in the environment. Continuous lighting is when you set up your own lights and control them yourself.
There are advantages and disadvantages to both methods. Natural lighting is free and it can give your video a more spontaneous feel. However, it’s also unpredictable and you can’t always control it. Continuous lighting is more expensive, but it gives you more control over the look of your video.
If you’re shooting a music video, you’ll probably want to use continuous lighting. This will give you the most control over the look of your video and help ensure that everything looks just the way you want it to.
strobe lighting
During a shoot, the videographer often has to make do with the conditions that exist on location. However, one important aspect of lighting that can be controlled is the frame rate. Heavy metal music is often associated with dim, fast-paced scenes with lots of movement. This look can be achieved by using strobe lighting.
Strobe lighting is a type of flashing light that is used to freeze action. It works by emitting short bursts of light at a high frequency. When used in video, it has the effect of making fast-moving objects appear to be in slow motion. Strobe lighting can be achieved either with natural light or artificial light sources.
To get the best results, it is important to understand how strobe lighting works and how to use it effectively. When using strobe lighting, there are three main factors to consider: frequency, duration, and intensity.
The Action
If you want to shoot a heavy metal music video, you need to have some action. This means that you need to have a lot of movement, fast pacing, and excitement. You also need to make sure that the band is in sync with the action. This can be a lot of fun to shoot, but it can also be a challenge. Let’s talk about some tips on how to shoot a heavy metal music video.
Slow motion
Slow motion is a technique that is often used in heavy metal music videos. This is because it can help to create an intense and powerful feeling, as well as making the action look more impressive.
To shoot slow motion, you will need to use a high frame rate camera. This means that the camera will be capturing a lot of frames per second, which can then be played back at a normal speed, resulting in the slow motion effect.
There are a few things to bear in mind when shooting slow motion:
-You will need a lot of light. This is because the camera will be capturing a lot of frames per second, which means that each frame will be exposed for less time. This means that if there isn’t enough light, the image will be very dark.
-You will need to use a tripod. This is because the camera will be capturing a lot of frames per second, which means that each frame will be exposed for less time. This means that if you handheld the camera, the image would be very blurry.
-You will need to shoot in short bursts. This is because the camera will be capturing a lot of frames per second, which means that it will quickly fill up your memory card. So, you will need to shoot in short bursts and then transfer the footage to your computer so that you don’t run out of space.
Time-lapse
Time-lapse is a technique whereby the film is exposed at a much lower rate than that used to normally record images. When projected at the normal rate, time appears to be moving faster and thus lapsing. The action is often too fast to be seen, so using this technique can slow it down.
This technique can also be used to produce special effects, such as a scene where the environment appears to be moving backwards while the subject is stationary.
Cinematic camera movements
There are many ways to add production value to your video without breaking the bank, and one of those ways is through camera movement. By adding dynamic camera movement, you can add interest and depth to your shots.
Cinematic camera movements can be divided into two broad categories: linear and nonlinear. Linear movements are straight forward and include dolly shots, tracking shots, and crane shots. Nonlinear movements are more complex and include 360-degree pans, whip pans, steep zooms, and handheld movements.
Dolly shot – A dolly shot is a smooth, controlled movement of the camera either towards or away from the subject. This can be done with a tripod mounted on a set of rails (a dolly), or by hand-holding the camera and physically walking towards or away from the subject.
Tracking shot – A tracking shot is similar to a dolly shot, but instead of moving the entire rig, you move the camera along while it’s mounted on a tripod or other support. This gives you the ability to keep the camera level as it moves.
Crane shot – A crane shot is any time the camera is moving up or down on an axis perpendicular to the ground (imagine a jib or crane arm moving up or down). These shots can be both very smooth or very jerky depending on how they’re executed.
360-degree pan – A 360-degree pan is when the camera does a full rotation on its horizontal axis. This can be done with the camera mounted on a tripod (preferably with a pan head) or by hand-holding the camera and physically rotating around in place.
Whip pan – A whip pan (or quick pan) is when the camera moves quickly from one side to another, often used as a transition between two shots. It’s important that the starting point and ending point are not in frame so that there’s no disorientation for the viewer. To execute this properly, start with the camera already in motion before bringing it into frame so that it’s moving at full speed by the time it gets there.
Steep zoom – A steep zoom is when you combine a zoom with tilting the camera up or down so that you get vertical movement in addition to zooming in or out horizontally. These kinds of zooms are often used for dramatic effect and can be quite dizzying if not executed properly!
Handheld movement– Handheld shots can give your video an organic feeling and make it seem less polished (which can be good or bad depending on your style). To get smooth handheld shots, use slow shutter speeds combined with low ISOs so that your images don’t come out blurry, and practice keeping your body as still as possible while panning around smoothly with your arms extended out from your sides.
The Audio
Get a shotgun mic
If you’re shooting live music, you need a shotgun mic. Shotgun mics are designed to capture sound from a distance, and they’re essential for getting clear audio of a live performance. Look for a shotgun mic with a long pickup range and good off-axis rejection — that means it will reduce the amount of background noise in your footage.
Get a lavalier mic
You’ll want to get a lavalier mic. This is a small microphone that you can clip onto the person’s clothes. It will allow you to get clean audio without having to worry about the microphone being in the shot.
Use a separate audio recorder
While some cameras have good on-board audio capabilities, for the best results you should use a separate audio recorder. This will give you much more control over the sound and allow you to get a much better quality recording.
It’s also a good idea to use a shotgun microphone for this type of shoot. Shotgun microphones are designed to pick up sound from a specific direction, which can be helpful when you’re trying to isolate the sound of the band from the crowd noise.
The Editing
There are a few key things to think about when editing a heavy metal music video. The first is the rhythm of the song. You want to make sure that the video editing matches the rhythm of the song, so it feels cohesive. Another thing to think about is the energy of the performance. You want to make sure that the video editing captures the energy of the performance, so the viewers can feel it.
Find the right software
The Editing – (Shooting Heavy Metal Music Videos)
You’ve finally finished shooting your first heavy metal music video. Now it’s time to edit the footage and create a final product that you can be proud of. But what software should you use?
There are a lot of different choices out there, and it can be tough to decide which one is right for you. If you’re just getting started, you may want to try a free or low-cost program like iMovie or Windows Movie Maker. These programs are easy to use and will help you get a feel for the editing process.
If you’re looking for something with more features, you may want to consider a program like Adobe Premiere Pro or Final Cut Pro. These programs are more expensive, but they offer a wide range of features that can help you create professional-looking videos.
Ultimately, the decision of which software to use is up to you. Take some time to explore your options and find the program that best suits your needs.
Use visual effects sparingly
While you might be tempted to go all out with the visual effects in your heavy metal music video, it’s important to use them sparingly. Too many visual effects can be overwhelming and take away from the music itself. Instead, focus on creating a few key visual elements that complement the song and add to its impact.
Use color grading
Color grading is the process of changing the colors of your video footage to create a certain look or feel. This can be used to make your footage look more natural, or to give it a more stylized look.
When shooting heavy metal music videos, you may want to use color grading to make your footage look more dark and ominous. To do this, you would want to increase the saturation of dark colors, and decrease the saturation of light colors. You would also want to increase the contrast, to make the shadows darker and the highlights brighter.