How to Make Electronic Music on a Mac
Contents
This step-by-step guide will show you how to make electronic music on a Mac. You’ll learn about the different software options, how to set up your audio interface, and how to start making some great sounding tunes.
Getting Started
If you want to make electronic music on a Mac, you’ll need a few things. First, you’ll need a DAW, or digital audio workstation. This is a program that you’ll use to compose, record, edit, and mix your music. Second, you’ll need some plugins. These are programs that add different sounds and effects to your music. Third, you’ll need some samples. These are pre-recorded sounds that you can use in your music. Finally, you’ll need a MIDI controller. This is a device that you can use to control your DAW and plugins.
Choose your audio interface
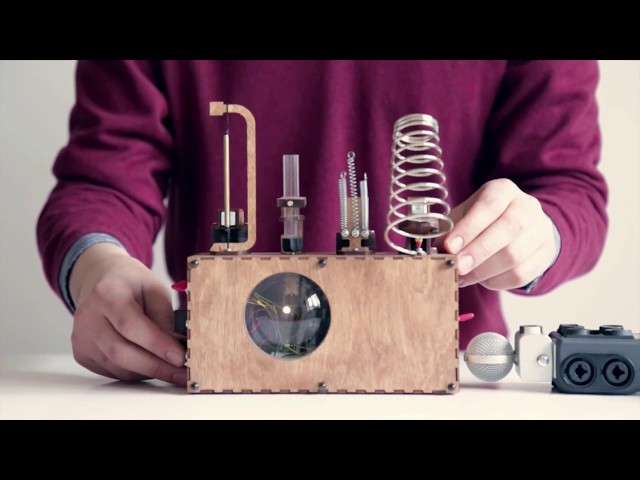
Now that you have your computer set up and ready to go, it’s time to choose your audio interface. An audio interface is a device that connects your computer to the rest of your music-making gear. It allows you to input and output audio, and usually comes with a built-in preamp (more on that later).
There are a lot of different audio interfaces on the market, so it’s important to choose one that will fit your needs. If you’re just getting started, you might want to go with a less expensive model that has the basic features you need. As you get more experience, you can upgrade to a more expensive model with more features.
When choosing an audio interface, there are a few things to keep in mind:
-What kind of inputs and outputs do you need?
-How many channels do you need?
-Do you need MIDI connectivity?
-What kind of preamp does it have?
-How much does it cost?
Once you’ve considered all of these factors, you should be able to narrow down your choices and find the perfect audio interface for your needs.
Install Ableton Live
Ableton Live is a digital audio workstation (DAW) and music production software. It is available for macOS, Windows, and Linux.
To install Ableton Live on your Mac:
1. Download the Ableton Live installer from the Ableton website.
2. Open the downloaded file and follow the instructions to install Ableton Live.
3. Once the installation is complete, open Ableton Live and create a new project.
4. To add audio files to your project, click on the “Add Track” button in the bottom left corner of the main window.
5. A new window will open, allowing you to browse your computer for audio files. Select the files you want to add and click “Open”.
6. The selected files will be added to your project as new tracks.
Choose your sound source
Now that you have your computer and audio interface set up and ready to go, it’s time to choose your sound source. If you’re not sure where to start, don’t worry – there are plenty of options available, and the best one for you will depend on your personal preference and style.
One popular option is to use a software synthesizer. Software synthesizers are programs that generate sounds using algorithms, rather than recorded samples of real-world instruments. They can be very powerful and flexible, giving you the ability to create any sound you can imagine.
If you’re looking for something that feels a bit more traditional, you may want to consider using a digital audio workstation (DAW). A DAW is a program that lets you record, edit, and mix multiple audio tracks. Many DAWs come with a wide selection of virtual instruments – such as pianos, guitars, drums, and strings – that you can use to create your music.
Another option is to use hardware synthesizers. These are physical devices that generate sounds using electronic circuits. Hardware synthesizers can be very expensive, but they offer a unique sound that is often difficult to recreate with software.
And finally, if you want to incorporate real-world sounds into your music, you can always Record them yourself! All you need is a microphone and something interesting to record – like an acoustic guitar or a voice. Once you’ve recorded your sounds, you can import them into your DAW or sampler for further processing.
Recording
You will need a computer and some type of audio interface to get started. If you want to get serious about making electronic music, you will need a DAW (Digital Audio Workstation). I recommend Ableton Live, but there are many other options out there. Once you have your DAW set up, you will need some plugins. I recommend Xfer Serum, Native Instruments Massive, and Sylenth1. These are just a few of the many options available to you.
Set up your audio interface
In order to make electronic music on a Mac, you’ll need to set up your audio interface. This is a hardware device that connects your computer to other musical devices, such as synthesizers, drum machines, and controllers.
1. Start by connecting the audio interface to your Mac using a USB or Thunderbolt cable.
2. Next, connect any musical instruments or external sound sources to the audio interface.
3. Finally, open your music software of choice and make sure that it is set up to use the audio interface as its primary sound source.
Set up Ableton Live
To get started, you’ll need to download and install Ableton Live. Once you have it installed, open the program and create a new project.
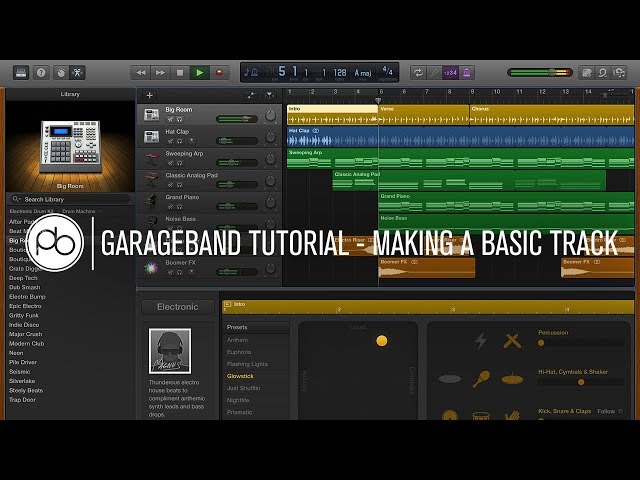
Ableton Live is divided into two main sections: the session view and the arrangement view. The session view is where you’ll do most of your work, as it’s where you add and remove tracks, record new parts, and mix everything together. The arrangement view is more like a traditional multitrack recorder, and it’s where you’ll assemble your song from the individual parts you’ve recorded in the session view.
For now, we’ll focus on the session view. To add a new track, click on the “Create new track” button in the upper-left corner of the window. A pop-up menu will appear; from here, you can select what type of track you want to create. For our purposes, we’ll choose “Audio.”
Next, click on the “Create” button in the lower-right corner of the window. This will add a new audio track to your project.
Record your audio
In order to record your audio, you will need a microphone and an audio interface. The audio interface will connect your microphone to your computer so that you can record your audio.
Once you have your microphone and audio interface set up, you will need to install a DAW (digital audio workstation) onto your computer. A DAW is software that allows you to record, edit, and produce your music.
There are a variety of different DAWs available, so it is important to do some research to find one that is compatible with your operating system and meets your needs. Once you have installed your DAW of choice, open it up and familiarize yourself with the interface.
When you are ready to record, make sure that your microphone is connected to your audio interface and that the interface is connected to your computer. Then open up your DAW and create a new project.
Once you have created a new project, you will need to create a track for your vocals. To do this, click on the “track” menu and select “new track.” Then choose “audio” as the type of track and click “ok.”
Next, you will need to select your input source. This is where you will choose the mic that you are using to record. If you are using more than one mic, you can choose which one you would like to use for each track.
Once you have selected your input source, click on the “record” button in your DAW and start singing! Be sure to sing loud enough so that the microphone can pick up your voice clearly. When you are finished recording, click on the “stop” button.
You can then listen back to what you have recorded by clicking on the “play” button. If you are happy with what you have recorded, then you can move on to the next step! If not, then simply click on the “delete” button and start over again.
Editing
If you want to make electronic music on a Mac, you need to first understand the basics of music composition. This includes understanding how to edit audio files. In this section, we’ll cover how to edit audio files using the built-in tools on a Mac. We’ll also cover how to use some popular third-party software for editing audio files.
Edit your audio in Ableton Live
Ableton Live is a powerful audio editing tool that allows you to record, edit and mix your music. If you are new to audio editing, it is recommended that you start with a simple program like Garageband or Logic Pro. However, if you are more experienced, Ableton Live is a great option for those who want more control over their sound.
In this guide, we will show you how to edit your audio in Ableton Live. We will cover topics such as:
-Recording and importing audio
-Editing audio clips
-Adding effects to your audio
-Mixing your tracks
-Exporting your tracks
Export your audio
Now that you have everything set up and you’ve written your masterpiece, it’s time to export your audio. To do this, click on File > Export > Audio. A new window will pop up. In the first drop-down menu, select the format you want to export your file as. For this tutorial, we’re going to export our file as an MP3. In the second drop-down menu, select the quality of the MP3. The higher the quality, the larger the file size will be. For this tutorial, we’re going to select “High Quality.”
In the next drop-down menu, select the sample rate. The sample rate is how many times per second the audio is sampled. The higher the sample rate, the better the quality of the audio but also the larger the file size will be. For this tutorial, we’re going to select “44100 Hz.”
The next setting is bit depth. Bit depth is how many bits are used to store each sample. The higher the bit depth, the better the quality of the audio but also the larger the file size will be. For this tutorial, we’re going to use “16 bits.”
The last setting is “Dither.” Dither is used to reduce quantization noise when reducing bit depth. For this tutorial, we won’t be using dither so leave that setting turned off.
Once you have all of your settings configured, click on “Export” and choose where you want to save your file. That’s it! You’ve now successfully exported your audio from Logic Pro X!
Mastering
Macs are popular among music producers. If you want to make electronic music, you will need to know how to use audio production software. In this article, we will show you how to make electronic music on a Mac. We will also give you some tips on how to get started.
Master your audio in Ableton Live
As a musician, it’s important to have control over the final sound of your music. That’s why producers and engineers often spend hours “tweaking” their audio files in search of the perfect sound. But what if there was a way to get that perfect sound without all the hassle?
Ableton Live is a powerful audio production software that gives you complete control over your sound. With Live, you can easily make your audio files sound exactly the way you want them to. In this article, we’ll show you how to use Ableton Live to master your audio on a Mac.
First, let’s talk about what “mastering” actually is. Mastering is the process of taking an audio file and making it sound its best. This includes adjusting the volume, EQ, stereo image, and more. Mastering is generally done in a program like Ableton Live, which gives you complete control over your sound.
Once you’ve imported your audio file into Ableton Live, you’ll want to start by adjusting the overall volume. You can do this by clicking on the “Master” track and adjusting the “Gain” knob. If your track is too quiet, you can turn up the Gain knob. If it’s too loud, you can turn it down.
Next, you’ll want to adjust the EQ of your track. The EQ allows you to boost or cut certain frequencies in your track. For example, if your track sounds too “muddy,” you could cut some of the low frequencies with the EQ. Or if your track sounds too “tinny,” you could boost some of the high frequencies.
After adjusting the EQ, you’ll want to focus on the stereo image of your track. The stereo image is how wide or narrow your track sounds. A wider stereo image will make your track sound bigger, while a narrower stereo image will make it sound more focused. You can adjust the stereo image by using the “Width” knob in Ableton Live’s mixer window.
Finally, you’ll want to add some effects to your track if needed. Effects like reverb and delay can help give your track more depth and space. To add an effect, simply click on the “Effects” tab in Ableton Live’s mixer window and insert an effect into one of theEffectslots . You can then adjust the parameters of that effect to taste . For example , if you’re using reverb , you can adjust tthte wet/dry mix , pre-delay , decay time , etc . Experiment with different effects and settings until you find something that sounds good .
summing upMastering yyour audio in Ableoton Liive is a great way o get pro-quality sounnds without needing an expensive studioe . By folllowing thhe steps above,,you ccan easily makke any audiio file sounnd its bestt .
Export your audio
Now that you’ve mixed down your electronic music project, it’s time to export the audio so you can share it with the world. In this article, we’ll show you how to export audio in Ableton Live on a Mac.
First, open your project in Ableton Live and make sure all of your levels are set correctly and that your mix sounds good. Once you’re happy with the mix, it’s time to render the audio.
To do this, go to File > Export > Audio/Video. In the Export Audio/Video window that appears, make sure that the format is set to AAC and the quality is set to 320 kbps. You can also change the file name and destination if you wish.
Once you’ve made your selections, click Export and Ableton will render your project as an AAC file.