How to Produce Electronic Music in 7 Steps
Contents
A complete guide on how to produce electronic music, from start to finish, in 7 easy steps.

Introduction
With the vastness of the Internet, you can find almost anything online – including production tutorials. Whether you’re just getting started or you’ve been producing for awhile, there are always new methods and techniques to learn. We compiled some of our favorite tips from an array of sources to get you started on your electronic music journey.
The Production Process
The electronic music production process can be divided into seven steps: composing, sound design, recording, editing, mixing, mastering, and releasing. Although these steps are listed in a linear fashion, they are often intertwined and can be completed in any order. In this article, we will go over each step in detail so that you can get a better understanding of how to produce electronic music.
Pre-production
Pre-production is the planning phase of your project where you determine what you want to achieve, what format it will take, what gear and software you will need, and who will be involved. This is also the time to start creating an overall vision for your project by listening to music that inspires you and collecting samples, sounds, and other materials that you can use in your own tracks.
Production
Anyone can produce electronic music, but it takes a little bit of know-how to produce professional sounding tracks. This guide will walk you through the production process step-by-step, from start to finish.
1. Choose your composition software.
2. Choose your audio interface and MIDI controller.
3. Connect your audio interface and MIDI controller to your computer.
4. Choose and load your sounds into the composition software.
5. Build your track by sequencing the sounds into patterns and arranging the patterns into a song structure.
6. Mix and master your track to control the overall sound and level balance.
7. Export your track as a final audio file.
Post-production
After you have recorded and edited your music, it’s time for post-production. This is where you add any final touches and make sure everything is perfect before releasing your track to the world.
Here are seven steps to take during the post-production process:
1. Balance the levels of each track.
2. Apply EQ and compression to each track.
3. Add effects such as reverb and delay.
4. Arrange the tracks in a logical order.
5. Print the tracks to a new file (a “print mix”).
6. Listen to the print mix and make final adjustments.
7. Export the track as a final file format (WAV, MP3, etc.).
The Equipment You Need
You may be wondering what equipment you need in order to produce electronic music. The good news is that you don’t need much! In this article, we’ll go over the 7 pieces of equipment that you need in order to get started.
A computer
If you want to produce electronic music, you need a computer. A laptop will do, but a desktop computer will give you more power to work with. You’ll also need a audio interface, which is a device that allows you to connect your instruments and other gear to your computer.
In addition to a computer and an audio interface, you’ll need some software. There are many different kinds of software available for making electronic music, so it’s important to choose one that’s right for you. There are two main types of software: digital audio workstations (DAWs) and virtual instruments (VSTs). DAWs are used for recording, editing, and mixing audio, while VSTs are used for creating and playing back sounds.
Once you have the basic equipment and software, you’ll need some additional gear to create your music. This includes things like synthesizers, drum machines, samplers, and MIDI controllers. You can start with just a few pieces of gear and add more as you grow your studio.
With the right equipment and software, you can start making electronic music today.
Music software
In order to get started producing electronic music, you will need some basic equipment. The most important piece of equipment you will need is music software. This is what you will use to create and edit your music. There are many different types of music software available, so it is important to choose one that is right for you. There are two main types of music software: digital audio workstations (DAWs) and MIDI controllers.
Digital audio workstations (DAWs) are the more popular type of music software. They allow you to record, edit, and mix audio. They also come with a variety of built-in sounds and effects. Some popular DAWs include Ableton Live, Logic Pro, and Propellerhead Reason. If you are just starting out, it is recommended that you choose a DAW that is easy to use and comes with a lot of tutorials and support.
MIDI controllers are less common than DAWs, but they are still used by some producers. MIDI controllers are used to create and edit MIDI data. They do not have any built-in sounds or effects. Instead, they rely on the sounds from your computer’s sound card or from an external sound module. Popular MIDI controllers include the Akai MPD series and the Native Instruments Komplete Kontrol series. If you are interested in using a MIDI controller, it is recommended that you have some experience with music production first.
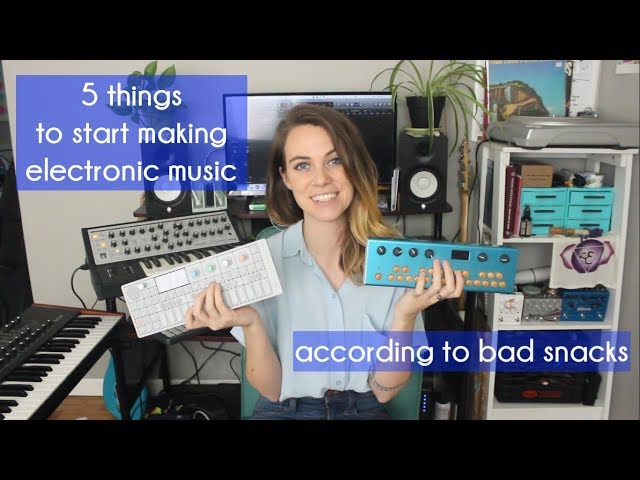
MIDI controllers
MIDI controllers come in all shapes and sizes, from drum pads to full-sized keyboards. If you want to produce electronic music, you’re going to need some kind of MIDI controller to create and record your sounds. The good news is that there are plenty of options out there, so you can find something that fits your needs and budget.
Here are a few things to keep in mind when shopping for a MIDI controller:
-Number of keys: Do you need a full-sized keyboard, or will a smaller one do?
-Other controls: Most MIDI controllers have other controls besides keys, such as faders, knobs, and pads. Decide what types of controls you’ll need for the music you want to create.
-Portability: Do you need something that’s easy to transport, or is a stationary controller fine?
-Price: MIDI controllers can range in price from under $100 to several thousand dollars. Decide how much you’re willing to spend.
Once you’ve considered these factors, you’re ready to start shopping for your MIDI controller. Here are a few popular options:
Ableton Push 2: This is a popular option for producers who want a versatile controller that can do it all. It has 64 pads, eight touch strips, and plenty of other controls to give you everything you need to create great music. It’s also portable and relatively affordable, making it a great option for beginners and advanced producers alike.
Native Instruments Maschine MK3: Another popular option for producers, the Maschine MK3 is ideal for those who want an all-in-one solution for creating music. It has all the performance pads and other controls you need, plus a built-in audio interface and sequencing capabilities. It’s on the more expensive side, but it’s worth it if you want a powerful device that can do it all.
Arturia MiniLab MkII: This is a great option if you’re looking for an affordable MIDI controller with 25 keys and 16 pads. It’s perfect for those who want a compact controller that’s easy to transport but still has everything they need to create great music.
Getting Started
Are you interested in producing electronic music but not sure where to start? This guide will walk you through the basics of getting started with producing electronic music. We’ll cover the equipment you’ll need, how to find samples, how to create your own samples, and how to put everything together. By the end of this guide, you’ll have everything you need to start producing your own electronic music.
Creating a project
Creating a project in your DAW is the first step in starting to produce electronic music. In this article, we’ll show you how to do it in 7 steps.
1.
2.
3.
4.
5.
6.
7.
Adding audio tracks
The first step to learning how to produce electronic music is understanding the basics of adding audio tracks. In your DAW, you will typically have an audio track that already exists on your computer. This track is generally a kick drum, snare drum, or hi-hat track. You can also add audio tracks by recording your own sounds using a microphone, or by downloading sounds from online libraries.
When adding audio tracks, you will need to specify the BPM (beats per minute) of the track. The BPM dictates the tempo of the song, and should be consistent throughout the entire track. You can change the BPM of a track by clicking on the tempo button in your DAW and specifying the new BPM.
Audio tracks can also be trimmed, cut, or copied and pasted like MIDI tracks. This allows you to create custom patterns and arrangements for your track. To trim an audio track, simply click and drag on the edges of the waveform until it is the desired length. To cut or copy an audio selection, press CTRL + X or CTRL + C respectively. To paste an audio selection, press CTRL + V.
Adding MIDI tracks
Now that you have a basic understanding of your DAW and some of its key features, it’s time to start adding MIDI tracks and programming in your first notes. In this section, we’ll go over how to add a MIDI track in Ableton Live, as well as how to program in your first notes using the piano roll editor.
Adding a MIDI track in Ableton Live is simple – just click on the ‘Create’ button in the top left corner of the screen and select ‘MIDI Track’ from the drop-down menu.
Once you’ve added a MIDI track, you’ll need to choose which instrument you want to program into it. You can do this by clicking on the ‘Instrument’ drop-down menu in the track header and selecting from the list of available instruments.
Now that you’ve selected an instrument, it’s time to start programming in some notes. This can be done by opening up the piano roll editor by clicking on the ‘Piano Roll’ button in the bottom right corner of the screen.
In the piano roll editor, you can click on individual notes to program them in, or use your mouse or keyboard to draw in longer sections of melody or chords. Experiment with different ways of programming in your notes until you find a workflow that works for you.
Recording Audio
In order to produce electronic music, you will need to record audio. This can be done using a microphone, an electronic musical instrument, or a computer. Once you have recorded your audio, you will need to edit it to make it sound the way you want.
Setting up your microphone
One of the most important pieces of recording equipment you’ll need is a microphone. Depending on the type of music you want to produce, you might need one or more microphones. If you plan on recording vocals, you’ll need a good quality microphone that captures sound well. There are many different types of microphones available, so do some research to find the best one for your needs.
If you’re planning on recording instruments, you’ll need at least one microphone that picks up sound well. If you’re recording a drum set, for example, you might need several microphones to capture all the different elements. Again, there’s a lot of variety in microphones, so it’s worth doing some research to find the right ones for your needs.
Recording your audio
In order to get started, you’ll need some audio to work with. This can be in the form of a pre-recorded track, or a live performance that you’ve captured using a microphone. If you’re starting with a live performance, you’ll need to make sure that the audio is of high enough quality to be used in your final track.
Once you have your audio, you’ll need to import it into your DAW (Digital Audio Workstation). This is the software that you’ll use to edit and mix your track. Once your audio is imported, you can start editing it to create the sound that you want.
There are a few different things that you can do to recorded audio to change its sound. These include:
Equalization: This is where you adjust the levels of different frequencies in the audio. This can be used to boost or cut certain frequencies, and can help to give your track more character.
Compression: This is where you reduce the dynamic range of an audio signal. This can make a track sound louder and more “in your face”, but can also make it sound less natural.
Reverb: This is where you add an artificial sense of space to an audio signal. This can be used to make a track sound like it was recorded in a large room, or even in an outdoor space.
Delay: This is where you add an echo effect to an audio signal. This can be used for creative effects, or simply to make a track sound more spacious.
Once you’ve edited your audio, you can then start working on the arrangement of your track. This is where you decide how the different parts of your track will fit together. You can add new parts, remove parts, and rearrange parts until you have something that you’re happy with.
Once your arrangement is complete, it’s time to start mixing your track. This is where you adjust the levels of different tracks and add effects like reverb and delay. The goal of mixing is to create a balance between all of the different elements in your track so that everything can be heard clearly.
Once your mix is sounding good, it’s time to export it as a final file that can be shared with others. Congratulations – you’ve just produced your first electronic music track!
Editing Audio
Assuming you have a basic understanding of sound and how it works, you’re ready to start learning how to produce your own electronic music! You will need a computer with some fairly powerful audio editing software. In this article, we’ll be using Ableton Live 9.
Cutting and splicing
If you’re working with recorded audio, one of the first things you’ll need to learn is how to cut and splice it. This is a basic but essential skill in any audio editing workflow.
To cut and splice audio, you’ll need a digital audio editor such as Audacity or Garageband. Once you have your software open and your audio file loaded, you can start cutting and splicing by following these steps:
1. Find the start and end points of the section you want to cut or splice. This can be done by listening to theaudio file and using the playback controls to identify the precise moments you want to edit.
2. Once you’ve found the start and end points, use the editing tools in your software to mark them. In Audacity, this is done by clicking and dragging with the Selection tool.
3. With the section marked, you can now either delete it or Splice it out by choosing Edit > Split Cut/Delete Selection from the menu.
4. If you’re Splicing out a section, you’ll need to find a suitable replacement piece of audio to insert in its place. This can be another section from the same file, or a completely different audio file altogether.
5. To insert the replacement audio, simply drag it into place on the timeline so that it lines up with the beginning of the section you’re Splicing out.
6. Once you’re happy with your edits, save your work by choosing File > Export from the menu.
Adding effects
Now that you’ve chosen the perfect sound and recorded it in your DAW, it’s time to add some effects! This is where things can start to get creative. You can experiment with different effects to change the timbre, texture, and overall feel of your sound.
There are endless possibilities when it comes to effects, but here are a few common ones that you might want to try:
Reverb: Reverb creates a sense of space and can make your sound seem larger than life. It’s often used to make drums and vocals sound fuller, but it can be used on any type of sound.
Delay: Delay is an echo effect that can be used to create a variety of sounds, from a simple repeat of the sound to a more complex ambiance. It’s often used on guitars and vocals to create a sense of depth and space.
Chorus: Chorus is an effect that creates a doubling or detuning effect, making the sound seem richer and fuller. It’s often used on guitars, keyboards, and vocals.
Compression: Compression is an effect that evens out the dynamics of a sound, making it louder or softer as needed. It’s often used on drums and vocals to control the level of the sound and prevent clipping (a distorted sound caused by the signal being too loud).
EQ: EQ is an effect that allows you to boost or cut certain frequencies in a sound. It’s often used to shape the overall tone of a track or make specific sounds stand out more (or less).
Mixing and Mastering
In this section, we’ll go over the basics of mixing and mastering. These are two very important steps in the production process, and by taking the time to learn them, you’ll be able to produce much better sounding music.
Mixing your track
In music production, mixing is the process of taking all of the individual tracks in a song and blending them together into one cohesive track. The goal is to make all of the instruments and vocals sound good together, without any one instrument or vocal line overpowering the others.
There are a few different ways to approach mixing, but in general, you will want to start by balancing the levels of all of your tracks. Once you have the levels balanced, you can start to add EQ and other effects to each track to help them all fit together nicely. Finally, you will need to do a little bit of “mastering” to ensure that your track sounds its best when played back on different speakers and sound systems.
1. Start by balancing the levels of all your tracks. You want all of the instruments and vocals to be audible, but you don’t want any one track to be too loud or too quiet.
2. Once the levels are balanced, start adding EQ and other effects to each track. This step is about making each track sound its best on its own, as well as making sure it fits well with the other tracks in the song.
3. When you’re happy with how everything sounds, it’s time to do some mastering. Mastering is about ensuring that your track sounds its best on different speakers and sound systems. This includes adjusting the EQ, compression, and other factors.
Mastering your track
The mastering process is the final step in the music production process. It’s where you take your mixed track and give it that final polish to make it sound radio-ready and professional.
There are a few key things you’ll want to do during the mastering process:
1. optimize the levels of your track so that it sounds its best when played back at different volumes
2. add any final EQ tweaks to balance out the frequencies of your track
3. add compression to even out the levels and give your track more punch
4. add limiting to prevent your track from distorting when played back at high volumes
5. use stereo widening techniques to create a more expansive soundscape
6. create a high-quality MP3 or WAV file of your track for distribution