Producing Electronic Music in Logic Pro – Online Courses
Contents
Whether you’re a beginner or a pro, our online courses on producing electronic music in Logic Pro will help you take your skills to the next level.
Introduction
Learn the basics of music production in Logic Pro. This course covers everything you need to know about the software, from its interface to how to use its various features. You’ll also learn about the different types of electronic music and how to create your own tracks.
The Logic Pro Interface
Logic Pro is a powerful and easy-to-use digital audio workstation (DAW) for creating, editing, and mixing music. In this course, you’ll learn all about the Logic Pro interface and how to use it to create and produce your own electronic music.
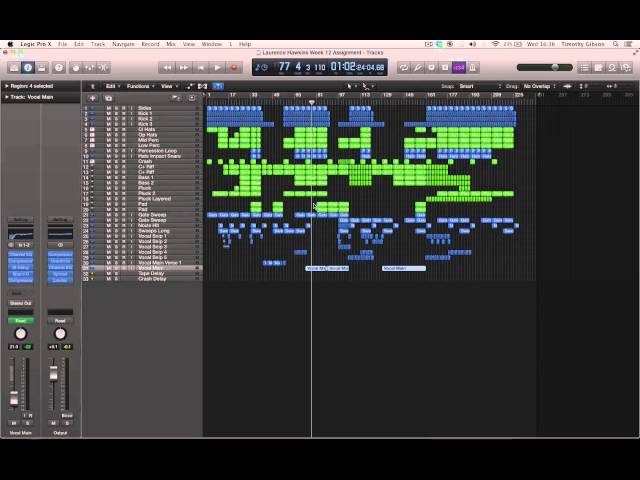
The Logic Pro interface is divided into four main areas: the Browser, the Arrange window, the Mixer, and the Inspector. Each of these areas has its own purpose and function, and you’ll spend most of your time working in one or more of them as you create your music.
The Browser is where you’ll find all of the sounds, instruments, effects, and loops that you can use in your project. You can preview sounds in the Browser before adding them to your project, and you can also create new sounds using Logic’s built-in synthesizers.
The Arrange window is where you’ll assemble your song by adding tracks, arranging sections of music, and adding automation. You can also record directly into the Arrange window using an external audio interface.
The Mixer is where you’ll mix your song by adjusting levels, panning, effects send levels, and plug-in parameters. You can also record mix automation directly in the Mixer.
The Inspector is where you’ll view and edit track parameters such as name, color, MIDI channel assignment, input/output routing, and more. You can also add comments to any track in the Inspector.
Working with Audio
Now that you’ve imported some audio into your project, it’s time to start working with it. In this section, you’ll learn how to edit audio regions, add effects, and more.
First, let’s take a look at how you can edit audio regions in Logic Pro. To do this, double-click on an audio region in the Tracks area to open the Region Inspector. Here, you can adjust the start and end points of the region, as well as its overall volume and panning.
You can also add effects to audio regions in Logic Pro. To do this, simply click on the ‘Effects’ button in the Region Inspector and choose from a range of built-in Logic Pro effects.
Finally, let’s take a look at how you can loop an audio region in Logic Pro. To do this, simply click on the ‘Loop’ button in the Region Inspector and select the ‘Enable Loop’ option. You can then adjust the start and end points of the loop using the ‘Loop Start’ and ‘Loop End’ options.
MIDI Recording and Editing
MIDI is a protocol that allows computers, musical instruments, and other devices to communicate with each other. MIDI is used extensively in the production of electronic music.
In order to record MIDI in Logic Pro, you will need a MIDI interface. This is a hardware device that converts the MIDI signals from your keyboard or other MIDI controller into digital data that can be processed by your computer.
Once you have a MIDI interface, you can connect it to your computer and launch Logic Pro. When you create a new project, you will be asked to choose a template. For the purpose of this tutorial, we will be using the “Empty” template.
Once you have created a new project, you will need to create a new track. To do this, go to the File menu and select New Track -> MIDI Track. A new track will be created with a default name of “MIDI Track 1”.
Next, you need to select the input for your MIDI track. Click on the “I/O” button at the top of the track and select your MIDI interface from the “Input” drop-down menu. If you are using a keyboard or other controller with built-in sounds, you can also select the “Output” drop-down menu and choose your interface from there as well.
Now that your MIDI input is configured, you are ready to start recording! To begin recording, simply click on the “Record” button at the bottom of Logic Pro’s window. You will see the transport bar change color to indicate that you are in record mode. Now play your keyboard or controller and Logic Pro will record your performance as MIDI data.
Once you have finished recording, you can edit your performance using Logic Pro’s built-in editing tools. For more information on how to edit MIDI data in Logic Pro, please check out our guide “Editing MIDI Data in Logic Pro”.
Mixing and Automation
In music, automation is a system where parameters of a sound source are changed over time to affect the audio signal. Automation is typically used to change the volume, dynamics (compression/limiting), equalization, effects (delay/reverb), and other characteristics of the sound. In Logic Pro, automation can be written in and edited using the Automation Lane in the Track Inspector.
To automate a parameter in Logic Pro, first select the track that you want to automate. Then, click on the small pencil icon next to the desired parameter in the Track Inspector. This will open up an Automation Lane for that parameter in the main track area. From here, you can use your mouse or a pen tablet to draw in automation points. These points can be moved and adjusted as needed to change the automation curve.
It’s important to note that you can automate any parameter in Logic Pro, not just audio mixer controls. You can automate MIDI parameters such as note velocity, pitch bend, and more. You can even automate plugin parameters such as delay time or EQ frequencies. The sky’s the limit!
Logic Pro Effects
There are many types of effects that can be used in Logic Pro, from simple EQ to complex multi-effect plug-ins. In this course, we’ll focus on using some of the most commonly used effects, and how they can be used to enhance your productions.
EQ is probably the most basic and essential of all audio effects. It can be used to boost or cut certain frequencies, and can help you to shape the sound of your track.
Compression is another essential effect, and is often used to even out the level of a track, or to add punch and power.
Reverb is an effect that simulates the reflections of sound in a room, and can be used to add space and depth to a track.
Delay is an echo effect that can be used to add interest and texture to a track.
Chorus is an effect that adds movement and width to a sound. It can be used sparingly on individual sounds, or as a whole-track effect.
Logic Pro also has a number of built-in instruments that can be used to create electronic music. In this course we’ll focus on using the Ultrabeat drum machine and the ES2 synth.
Sampler Instruments
One of the great things about Logic is that it comes with a huge range of virtual instruments, which you can use to create all kinds of different sounds. Sampler instruments are particularly useful for creating sounds from scratch, or for manipulating and processing pre-recorded audio files.
In this course, we’ll look at how to use sampler instruments in Logic Pro to create a range of different sounds. We’ll start by exploring the EXS24 sampler instrument, and looking at how to load and play audio files in the EXS24. We’ll then move on to look at how to use the Sculpture physical modeling synthesizer to create a range of organic, atmospheric sounds. Finally, we’ll explore the Ultrabeat drum machine/sampler, and look at how to create custom drum kits and sequences.
The Drum Machine Designer
The Drum Machine Designer is a powerful tool that lets you create your own drum sounds, beats, and rhythms. With it, you can add realism to your drum tracks by layering different sounds together, or create completely new and unique rhythms. You can also use the Drum Machine Designer to create customized fills and breaks.
Flex Time and Pitch
In music, Flex Time is a feature in Logic Pro that allows you to change the timing and rhythm of your recordings. This can be useful for many different applications, such as fixing an incorrect note, making a vocal line fit better with the rest of the track, or making drums sound more natural.
Pitch is another important element in music production, and Flex Time can also be used to change the pitch of recordings. This can be helpful for correcting out-of-tune notes, or for creating special effects.
Flex Time and Pitch can be edited together or separately. To edit both at the same time, select the Flex tool from the main toolbar. Then, click and drag on a section of audio to make your changes.
To edit Flex Time or Pitch separately, first click on the track header to open the Track Inspector. Then, click on the Flex Mode drop-down menu and choose either Tone or Rhythm. Now you can make your changes in either Flex Time or Pitch without affecting the other.
Logic Remote
Logic Remote is a free iOS app that provides a new way to control Logic Pro X on your Mac. With Logic Remote, you can play and record software instruments, mix tracks, and control features like Live Loops and Drum Synth. You can even use the app to control multiple parameters on multiple instruments at the same time.
Exporting and Sharing
Now that you’ve completed your song, it’s time to share it with the world! In this section, you’ll learn how to export your Logic Pro project as an audio file that can be shared online or burned to a CD. You’ll also learn how to share your Logic Pro project with another Logic Pro user.
Exporting an audio file
When you export an audio file from Logic Pro, you’re essentially creating a copy of your project that can be played back on any device that supports the audio file format you choose. To export an audio file:
1. In the Arrange area, position the playhead at the point in your project where you want the export to start.
2. From the File menu, choose Export > Export Audio/Video.
3. In the Export Audio/Video dialog that appears, choose your desired settings and click Export.
And that’s it! Your Logic Pro project is now exported as an audio file.