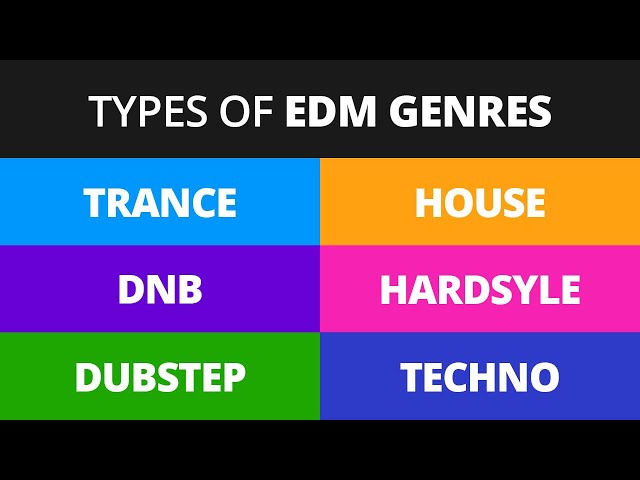
Udemy Mixing & Mastering Electronic Dance Music (EDM)
Contents
A guide to mixing and mastering electronic dance music (EDM) from world-renowned producer, DJ, and Udemy instructor, Stefan Loader.
Introduction
In this Udemy course, you’ll learn all about mixing and mastering electronic dance music. Whether you’re a beginner or a pro, we’ll cover everything you need to know to get the best possible sound for your tracks.
We’ll start by looking at the basics of mixing and mastering, including levels, EQ, compression, and reverb. Then we’ll dive into more advanced topics like stereo imaging, limiting, and sidechain compression. By the end of the course, you’ll have a solid understanding of how to mix and master your tracks for maximum impact.
The Tools You’ll Need
No matter what DAW you’re using, you’ll need a few essential plugins for mixing and mastering EDM. Here’s a list of must-haves:
Equalizer: A good EQ is essential for shaping the sound of your track. A versatile EQ will have both high and low pass filters, as well as parametric EQs that allow you to target specific frequencies.
Compressor: A compressor is key for bringing your track to life and making it sound more polished. It can be used to even out the levels of your track, or to add sustain and punch to certain sounds.
Limiter: A limiter is used to prevent your track from clipping (distorting) when it’s played back at high volumes. It’s essential for getting your track sounding its best when played on club systems or in online streams.
Reverb: Reverb is used to create a sense of space in your mix. It can be used on individual sounds or on the whole mix, and comes in different flavors such as plate, spring, and hall reverbs.
Delay: Delay is another tool for creating a sense of space in your mix. It can also be used to add interest and movement to individual sounds or the whole track.
These are just a few of the essential plugins you’ll need for mixing and mastering EDM. Of course, there are many more plugins available that can be useful for specific tasks or sounds. However, these are the ones that will get you started on the right foot.
Setting Up Your DAW
Your DAW (Digital Audio Workstation) is the heart of your studio. It’s where you’ll do the vast majority of your work, so it’s important to choose one that’s right for you. In this course, we’ll be using Logic Pro X, but feel free to use whichever DAW you’re most comfortable with. If you don’t have a DAW yet, we recommend checking out our friends at Splice – they have a great program called Rent-to-Own that lets you pay for your DAW monthly until you own it outright.
Once you have your DAW set up, it’s time to start thinking about which plugins and virtual instruments you want to use. In this course, we’ll be using a lot of different plugins from iZotope, Waves and Native Instruments, but again, feel free to use whatever you’re most comfortable with. The important thing is that you have a good understanding of how your chosen plugin works before we dive into the mixing and mastering process.
If you need help getting started with setting up your DAW or choosing plugins, be sure to check out our other course – Intro to Music Production.
Creating a Basic Drum Loop
Start by opening a new project in your DAW of choice. For this tutorial, we’ll be using Ableton Live 9. Create a new MIDI track and load your favorite drum plugin. We’ll be using Superior Drummer 2.0 for this tutorial.
Create a new MIDI clip and draw in your desired drum pattern. For this example, we’ll just be using a basic four-on-the-floor kick drum pattern.
Next, add a bass instrument to your project. We’ll be using Native Instruments Massive for this example. Create a new MIDI clip and draw in a bassline that compliments your kick drum pattern.
Now that we have our basic foundation laid out, let’s start adding some layers to our drums. Add a snare drum layer to compliment your kick drum pattern. For this example, we’ll just be adding a simple side-chain spiced snare on the 2 and 4 of the measure.
Next, let’s add some hi-hats to ourpattern. We’ll be using Superior Drummer 2.0 again for this example and layering in some closed and open hat samples to taste. You can get as creative as you want with your hi-hat patterns, but for this example, we’ll just be keeping it simple with an 8th note pattern on the off-beats..
Now that we have our basic drum loop created, let’s add some variation by adding fills every 4 measures or so.. A good rule of thumb is to keep your fills simplistic at first and then build up to more complex patterns as you become more comfortable with them.. For our first fill, we’ll just be adding a few extra snare hits on beats 2 and 4..
That concludes the basics of creating a drum loop.. In the next section, we’ll start adding more percussion elements to our mix.
Adding Bass
Bass is one of the most important elements in electronic dance music. It provides the low-end frequencies that are essential for creating a full, rich sound. When mixin
##Before you start adding bass to your track, it’s important to understand the different types of bass sounds that are available. There are three main types of bass sounds:
##1. Synth bass
##2. Sampled bass
##3. Live bass
Each type of bass has its own unique character and can be used to create a different feel in your track. For example, synth bass can be used to create a more synthetic sound, while sampled bass can be used to add more realism to your track. Live bass is often used in organic sounding tracks or tracks that need a more human feel.
Once you’ve decided which type of bass sound you want to use, you can begin adding it to your track. When mixing bass, it’s important to pay attention to the relationship between the kick drum and the bassline. The kick and the bass should complement each other and work together to create a powerful low-end foundation for your track.
Here are a few tips for mixing bass:
1. Start by setting the level of the kick drum so it sits nicely with the rest of the drums in your track. Then, add thebassline so it sits underneath the kick drum.
2. Make sure the kick and the bass sound good together before you start adjusting levels. A good way to do this is by playing them both at the same time and listening for any clashes or areas where they don’t sound good together. If you hear any problems, make sure to adjust either the kick drum or thebassline so they fit together better. 3 Try using EQ to shape both the kick and thebassline so they work well together. For example, if thekick sounds too “boomy” you can use a high-pass filterto cut out some of the lower frequencies. Alternatively, ifthebassline sounds too “muddy” you can use a low-pass filterto cut out some of the higher frequencies 4 Use compression on boththekick andthebasslineto even out their levels and help them sit nicely together in your mix 5 Pay attention to how much low endyou have in your mix overall. Too much low endcan make yourtrack sound muddy or cluttered, so if you find thatyourmix is startingto sound muddy you may needto cut back on someof izardo
Adding Synths
In this section we will add some synths to our track. We will use two different kinds of synths: a lead synth and a movement synth.
The lead synth will be used to play the main melody of our track. We want this synth to be fairly simple, so we will use a sawtooth wave.
The movement synth will be used to add some movement and interest to our track. We will use a square wave for this synth.
Mixing Your Track
Now that you have all of your tracks recorded, it’s time to start mixing! The mixing stage is where you will take all of the individual tracks and blend them together into a cohesive whole.
This is where you will control the levels of each track, as well as add effects like EQ, compression, and reverb. The goal is to create a mix that is balanced and sounds good on any system.
Here are some tips for mixing your EDM track:
-Start with the kick drum and bassline. These are the foundation of your track, so it’s important to get them sounding good first. Try to achieve a balance between the two elements so that neither one is overpowering the other.
-Next, add in the percussion elements. Once again, try to achieve a balance between all of the different percussion tracks. You don’t want one element to be too loud or too quiet in relation to the others.
-Now it’s time to add in the melodic elements. Start with the main melody, then add in any supporting melodies or countermelodies. Again, try to achieve a balance between all of the different elements.
-Finally, add any effects that you want to use. This could include EQ, compression, reverb,delay, etc. Be careful not to overdo it with the effects – less is often more in this case!
Mastering Your Track
Now that you have all your tracks sounding the way you want them to, it’s time to start thinking about the mastered version of your song. Mastering is the process of taking all the individual tracks in your project and assembling them into a final, polished version of the song.
The first step in mastering is to choose which version of each track you want to use in the final mix. This can be a tricky decision, as you may have several different versions of each track that you like for different reasons. Once you have chosen the versions of each track that you want to use, it’s time to start putting them together in the order you want them to appear in the final song.
Once you have decided on the order of your tracks, it’s time to start mixing them together. This is where you will adjust the levels of each track so that they are balanced with each other. You will also need to decide how much space each track should occupy in the mix. This is known as panning, and it allows you to place each track exactly where you want it in the stereo field.
After mixing your tracks together, it’s time to add anyfinal touches that will help your song sound its best. This can include adding effects such as EQ and compression, or using a limiter to ensure that your song doesn’t clip when played back on systems with lower volume levels.
Once you are happy with how your song sounds, it’s time to export it as an audio file so that it can be shared with others.
Conclusion
Now that you have reached the end of this course, you should have a much better understanding of electronic dance music and how to mix and master it. You should also be familiar with some of the most popular software programs and plugins used in EDM production.
If you found this course helpful, please consider leaving a review. We would also like to encourage you to keep practicing and experimenting with different techniques until you find a workflow that works best for you. Thank you for taking the time to learn with us, and we hope to see you again in our next course!