How to Do Microsoft Project and Don Funk Music Videos
Contents
How to Do Microsoft Project and Don Funk Music Videos
Introduction
In this guide, we’ll show you how to create a project in Microsoft Project and how to add music to your videos using the Don Funk Music app. After completing this guide, you’ll be able to create professional-looking project plans and video presentations that incorporate music into your video productions.
What is Microsoft Project?
Microsoft Project is a powerful project management software program. It can help you plan, track, and manage your projects effectively. In this guide, we’ll show you how to use Microsoft Project to create and manage your projects.
What is a Funk Music Video?
Funk is a style of music that was popularized in the 1970s. It is characterized by its heavy use of rhythm and blues, as well as its distinctive style of dancing. Funk music videos often incorporate elements of this style of dance, as well as other aspects of African American culture.
How to Do Microsoft Project
Microsoft Project is a software application that helps you plan, schedule, and control projects. You can use Microsoft Project to create and track project timelines, tasks, and resources. In this article, we’ll show you how to use Microsoft Project to create a project schedule and track progress.
How to install Microsoft Project
This article will show you how to install Microsoft Project. Microsoft Project is a project management software program that helps you plan, track, and analyze your projects.
First, you’ll need to make sure that your computer meets the minimum system requirements for Microsoft Project. You can find this information on the Microsoft Project website.
Next, you’ll need to download the installation file for Microsoft Project. You can do this from the Microsoft Project website or from a third-party website.
Once the file has downloaded, double-click on it to begin the installation process. Follow the prompts to complete the installation.
Now that Microsoft Project is installed on your computer, you’re ready to start planning your projects!
How to set up Microsoft Project
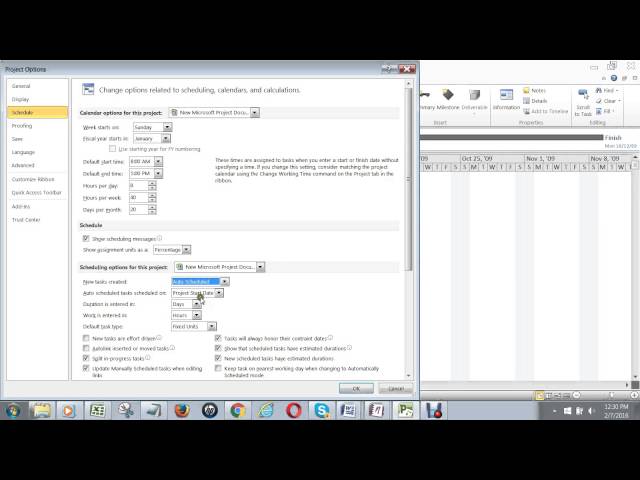
Before you do anything else, you need to set up Microsoft Project so that it works the way you want it to. You’ll need to decide what project file format to use, how dates and calendars should be formatted, what working days and hours should be used, and what column information should be included in your project files. You can change these settings at any time, but it’s best to do it before you start creating projects.
To change the default settings for new projects:
1. Open Microsoft Project.
2. On the File menu, click Options.
3. In the Options dialog box, click the General tab.
4. Make any changes that you want, and then click OK.
How to use Microsoft Project
Microsoft Project is a project management software program designed to assist a project manager in developing a plan, assigning resources to tasks, tracking progress, managing the budget, and analyzing workloads.
There are many ways to use Microsoft Project, but in this article we will focus on how to use it for simple project planning. If you need more help, there are many online tutorials and books that can assist you.
To get started, launch Microsoft Project and create a new project file. You will be prompted to enter some basic information about your project, including the project name, start date, and end date.
Once your project file is created, you can begin adding tasks. To do this, simply click on the “Task” tab and enter the name of the task in the “Name” field. You can also specify other information such as the start date, end date, duration, assigned resources, and so on.
Once you have entered all of your tasks, you can then begin assigning resources to them. To do this, click on the “Assign Resources” button on the toolbar and then select the resources you want to assign from the list that appears. Alternatively, you can double-click on a task to open the “Task Information” dialog box and then click on the “Resources” tab to assign resources from there.
Once your resources have been assigned, you can begin tracking progress on your tasks. To do this, simply click on the “Track Progress” button on the toolbar and then enter progress information for each task in the dialog box that appears. Alternatively, you can double-click on a task to open the “Task Information” dialog box and then click on the “Progress” tab to enter progress information from there.
As your project progresses, you will need to keep an eye on both the overall status of the project as well as individual tasks and resources. To do this, click on the “Project Summary” button on the toolbar or double-click anywhere in your project file to open the “Project Summary” dialog box. From here you can view an overview of your entire project as well as detailed information about specific tasks or resources.
You can also generate reports in Microsoft Project which can be very helpful in communicating project status to stakeholders or analyzing different aspects of your project. To generate a report, simply click on the “Reports” button onthe toolbar and then select which type of report you want to generate fromthe list that appears. Alternatively, youcan double-clickon any taskor resourcein your fileto open its respective dialog boxand then clickon thereportsbutton located therein generates different reports such as Gantt charts or resource utilization reports which can be very helpful in seeing how yourproject is progressing overall or identifying potential bottlenecks
How to Do Funk Music Videos
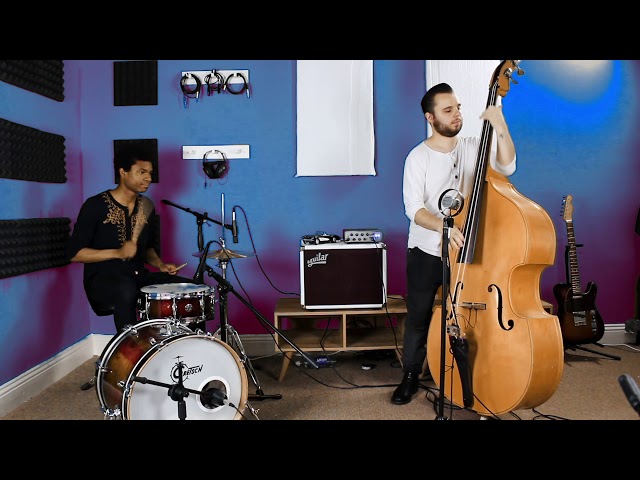
Funk is a style of dance that emphasizes the lower body and is often performed to music with a strong beat. The most important thing when doing funk music videos is to have fun and enjoy yourself. Remember to focus on the music and the beat, and let your body move naturally. You can also add your own style and personality to the mix.
How to find Funk Music Videos
Assuming you want to make a Funk music video, the first step is to find some good funk songs. You can look online or in record stores for funk albums. Once you have found some good songs, the next step is to get permission from the copyright holders to use the songs in your video. This usually requires paying a fee.
After you have obtained the rights to use the songs, you need to find footage of people dancing to funk music. This can be difficult, as there is not a lot of footage of people dancing to funk music available. One option is to shoot your own footage of people dancing. Another option is to use stock footage or found footage.
Once you have the footage, the next step is to edit it together into a cohesive video. This will require adding transitions, effects, and titles as needed. The goal is to create a video that is fun and entertaining to watch.
The final step is to promote your video. You can do this by posting it on social media or online video sharing sites. You can also promote it through word of mouth. If people like your video, they will share it with their friends and family members.
How to download Funk Music Videos
You can download Funk Music Videos by navigating to the Microsoft Project website and selecting the “Downloads” tab. From there, you will be able to select the Funk Music Videos that you want to download.
How to convert Funk Music Videos
You can use Microsoft Project to convert your Funk Music Videos. The process is actually quite simple, and you can use a variety of different software programs to make the conversion. In this article, we’ll show you how to use Microsoft Project to convert your Funk Music Videos.
First, you’ll need to download and install Microsoft Project. You can find a link to the download page in the Resources section below. Once you have Microsoft Project installed, launch the program and open the Funk Music Video file that you want to convert.
When the file opens, you’ll see a list of all of the tasks that need to be completed in order to convert the video. To change the file type, click on the “File” menu and select “Save As.” In the “Save As” dialog box, select “MP4” from the “Save as type:” drop-down menu and then click on the “Save” button.
That’s all there is to it! Once you’ve saved the file as an MP4, you can watch it on any computer or mobile device that supports MP4 files.