How to Play Lovesick Blues on Violin
Contents
Lovesick Blues is a great song for beginners to play on violin. This blog post will show you how to play Lovesick Blues on violin step by step.

Introduction
In this guide, we’ll show you how to play “Lovesick Blues” on the violin. This classic country song was made famous by Hank Williams, and has been covered by many artists over the years.
If you’re a beginner, don’t worry! We’ll start by covering the basic techniques you’ll need to know in order to play this song. Then, we’ll provide a step-by-step walkthrough of the tune so you can follow along at your own pace.
Before we get started, make sure you have a violin and rosin handy. You may also want to have a music stand so you can keep your music in front of you while you play.
What You Need
In order to play this song, you will need a violin, a music stand, and a the sheet music for “Lovesick Blues.” You may also want a practice mute for your violin, to help keep the noise down while you’re practicing.
Step One: Learn the Notes
Lovesick Blues is a great song for beginner violinists to learn. It’s a slow, easy song that sounds great on the violin. The first step to playing Lovesick Blues on the violin is to learn the notes. The notes for Lovesick Blues are A, D, E, and G. You can find these notes on the first, second, third, and fifth strings of the violin.
Step Two: Play the Notes in Sequence
Once you know the notes, you can start playing them in sequence. The sequence for Lovesick Blues goes like this: A, D, E, G, D, E, G. You can play these notes in any order you like, but this is the most common sequence.
Step Three: Add the Bowing
Now that you know where the notes are and what order they go in, you can start adding in the bowing. For Lovesick Blues, you will want to use a very simple bowing pattern of down-up-down-up. This means that you will start with your bow down on the string and then move up to play the note. After playing the note, you will move your bow down again and then back up to play the next note. You will continue this pattern for the entire song.
Step Four: Play it Slow at First
Lovesick Blues is a slow song, so it’s important that you play it slowly at first. This will help you get used to the bowing pattern and make sure that you’re hitting all of the notes correctly. Once you’re comfortable with how the song sounds played slowly, you can start to speed up your playing.
Step Two: Learn the Rhythm
i)Listen to the recording and count out the number of beats in each measure. The time signature is 4/4, which means there are four quarter note beats in each measure. In order to get the proper feel for the rhythm, it is important to count out loud while you listen to the recording.
ii) Play along with the recording, using whole notes for each pitch. Be sure to keep your bow moving smoothly and evenly across the strings. Remember to count out loud as you play.
iii)When you feel comfortable playing whole notes with the recording, begin to subdivide the beats into eighth notes. You should still be counting out loud as you play. As you become more familiar with the rhythm, you can start to speed up your bowing slightly so that each bow stroke covers two eighth notes instead of just one.
iv)The final step is to subdivide the beats into sixteenth notes. This can be a bit tricky at first, but just take your time and be sure to keep your bow moving smoothly across the strings. You should still be counting aloud as you play. As you become more comfortable with the rhythm, you can start to speed up your bowing slightly so that each bow stroke covers two sixteenth notes instead of just one.
Step Three: Play It Slow
Now that you know the notes, it’s time to start playing the song. But before you start picking up the tempo, it’s important to get the feel of the song by playing it slowly. This will help you get comfortable with the finger placement and bow strokes needed to play the tune.
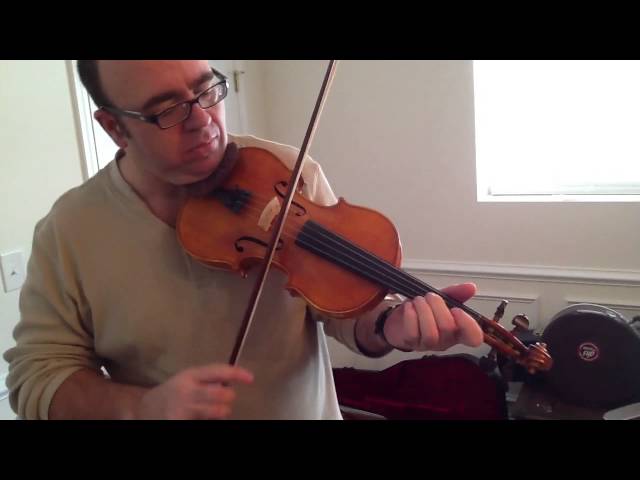
Step Four: Add the Bow
Now that you have your fingers in the correct position, it’s time to add the bow. First, hold the bow in your right hand and rest the pinky on the frog (the part of the bow closest to the handle). Then, place your thumb opposite your index finger on top of the bow. You might need to adjust your grip a bit so that all three fingers can touch the bow simultaneously.
Now that you have a good grip on the bow, it’s time to start playing! Place the hair of the bow on the string and gently pull while keeping a steady pressure. The sound you produce will be a little like a squeak, but don’t worry, this is normal! Just keep practicing and you’ll get better with time.
One more thing to remember is that you can play louder or softer by changing how much pressure you apply with your right hand. The harder you press, the louder the sound will be. The same goes for bowing speed – if you want a louder sound, you can try bowing faster.
Step Five: Play It Faster
Now that you know the melody, it’s time to play it faster. You can use a metronome or a drum beat to keep time, or you can do it without any accompaniment. Just make sure you are comfortable playing the melody before you try to speed it up.
Once you are comfortable with the melody, try adding some embellishments. You can add vibrato, trills or tremolos to add interest to the melody. Just make sure that you don’t overdo it and that your embellishments sound musical.
Step Six: Add the Vibrato
Now that you have the hang of playing the melody with the right hand, it’s time to add the vibrato. This will give the melody a richer sound and make it more expressive.
To do this, simply place your left hand on the string behind the stopbar and lightly hold down the string. Then, use your right hand to pluck the string as usual. As you pluck the string, quickly move your left hand back and forth so that the string vibrates against the stopbar. This will create a rich, expressive sound.
Step Seven: Play It with Feeling
As with all music, feeling is paramount when playing the blues. A good way to bring out the right feeling is to imagine you are singing the words as you play. This will help you play with more soul and express the emotion of the blues. Let the music flow through you and don’t be afraid to experiment with vibrato, slides and other effects to enhance your sound.
Conclusion
Now that you know the basics of how to play Lovesick Blues on violin, you can experiment with different styles and techniques to find your own unique sound. Remember to have fun and don’t be afraid to make mistakes – that’s how you learn and grow as a musician!