The Best Techno Music Visualizers
Contents
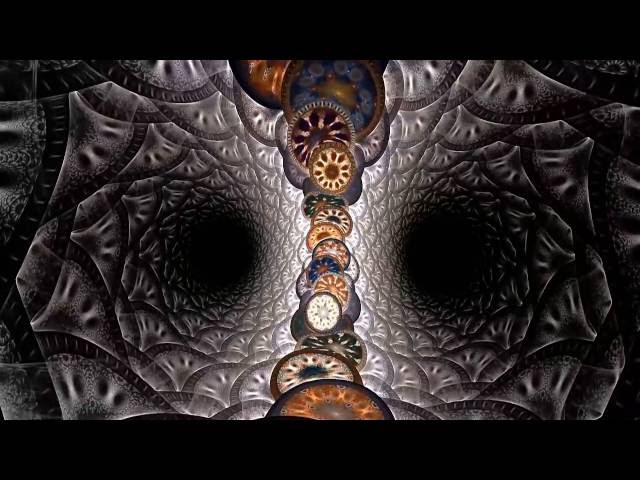
Find the best techno music visualizers to help you create a mind-blowing music video for your favorite song.
What is a Music Visualizer?
A music visualizer is a type of media player software that generates animated images or graphic representations of music. Music visualizers are often used as background graphics for video games or for music videos. Some music visualizers are simple in design, while others are complex and filled with a variety of colors and shapes.
How to Use a Music Visualizer
Techno music visualizers are a great way to add some flair to your music. They can be used to create an immersive experience for your listeners or to simply add some visual interest to your music. There are a few different ways to use a music visualizer. You can use them to create a video, to create an animated GIF, or to create a static image.
Install the software
To use a music visualizer, you need to install the necessary software on your computer. In most cases, this will be a media player that is capable of playing MP3 files. Some visualizers may also work with other types of audio files, but MP3 is the most common file type.
Once you have installed the software, you will need to download some music files to use with it. You can find many free MP3 files online, or you can ripped CDs into MP3 format. Once you have some music files, you can start using the visualizer.
##Heading: Start the visualization
##Expansion:
To start the visualization, simply launch the software and load one of your MP3 files. In most cases, the visualizer will automatically start playing the music. However, you may need to press a play button or load a playlist before it will start.
The visuals will change according to the beat and tempo of the music. As the music gets louder, the visuals will become more intense. Some visualizers also react to changes in pitch, such as when a note is played on a high-pitched instrument.
Choose the right settings
There are a lot of settings that you can tweak in order to get the perfect look for your music visualizer. For example, you can change the resolution, framerate, and color mode. You can also add or remove objects, and change their properties.
To change the settings, click on the ‘Settings’ button in the top menu. A new window will open up with a bunch of options. You can experiment with different settings to see what looks best with your music.
Once you’re happy with the settings, you can close the window and enjoy your music visualizer!
Output the video
To output the video, you need a program that can render video. This is typically done with a graphics processing unit (GPU). Many programs that can render video also have music visualizers built in. For this guide, we will be using the program Adobe After Effects.
Once you have a program that can render video, you need to create your project. For this project, we will be using a song called “Hypnotize” by The Notorious B.I.G.. The first step is to create a new composition. This is done by clicking Composition > New Composition in the menu bar.
In the new composition dialog, you will need to set the width and height of your output video. For this guide, we will be setting the width to 1920 and the height to 1080. You can leave the other settings at their default values.
Once you have created your composition, you will need to import your audio file. This is done by clicking File > Import > File in the menu bar. In the file import dialog, navigate to your audio file and click Open.
Your audio file will now appear in the Project panel of After Effects. Drag it from the Project panel into the Timeline panel so that it appears in the composition timeline.
The next step is to add a visualizer effect to your audio layer in the timeline. To do this, click Effect > Generate > Audio Spectrum in the menu bar. This will add the Audio Spectrum effect to your audio layer in the timeline with all of its default settings intact.
The Best Music Visualizers
There are many ways to enjoy music, but one of the most visually appealing is through a music visualizer. A music visualizer takes the music that you are playing and translates it into a unique and beautiful display. Many people enjoy having a music visualizer on while they are working or just relaxing. It can be a great way to add some personality to your music listening experience.
MilkDrop
MilkDrop is a freeware music visualizer for Microsoft Windows. It uses DirectX and can run as a Winamp plugin. MilkDrop was originally developed by Geiss in 2002. It was then open-sourced in 2004, and has been under active development ever since.
As of version 2.0, MilkDrop supports both direct3D 9 and 10, and can take advantage of hardware acceleration on modern graphics cards. MilkDrop can visualize any .wav file played in Winamp, as well as many .mp3 files.
G-Force
G-Force is a music visualizer and audio player for Windows that brings your music to life with colorful, dynamic visuals. It can respond to the music itself or be used as a standalone visualizer.
Visualizer for iTunes
The stand-alone iTunes visualizer iTunesVisual is one of the nicer-looking ones we’ve seen. The visuals respond to the music, and it’s easy on the CPU.
It’s tough to find a good music visualizer that also doesn’t hog all of your computer’s resources, but iTunesVisual manage to do both. The visuals are fluid and respond well to the music, without being too overwhelming or distracting. And, best of all, it doesn’t bog down your computer too much.
Conclusion
In conclusion, these are the best techno music visualizers that you can use to improve your audio experience. With any of these programs, you will be able to create amazing visuals that will make your music sound even better. As always, make sure to experiment and find the perfect combination of settings and visuals for your own personal taste.